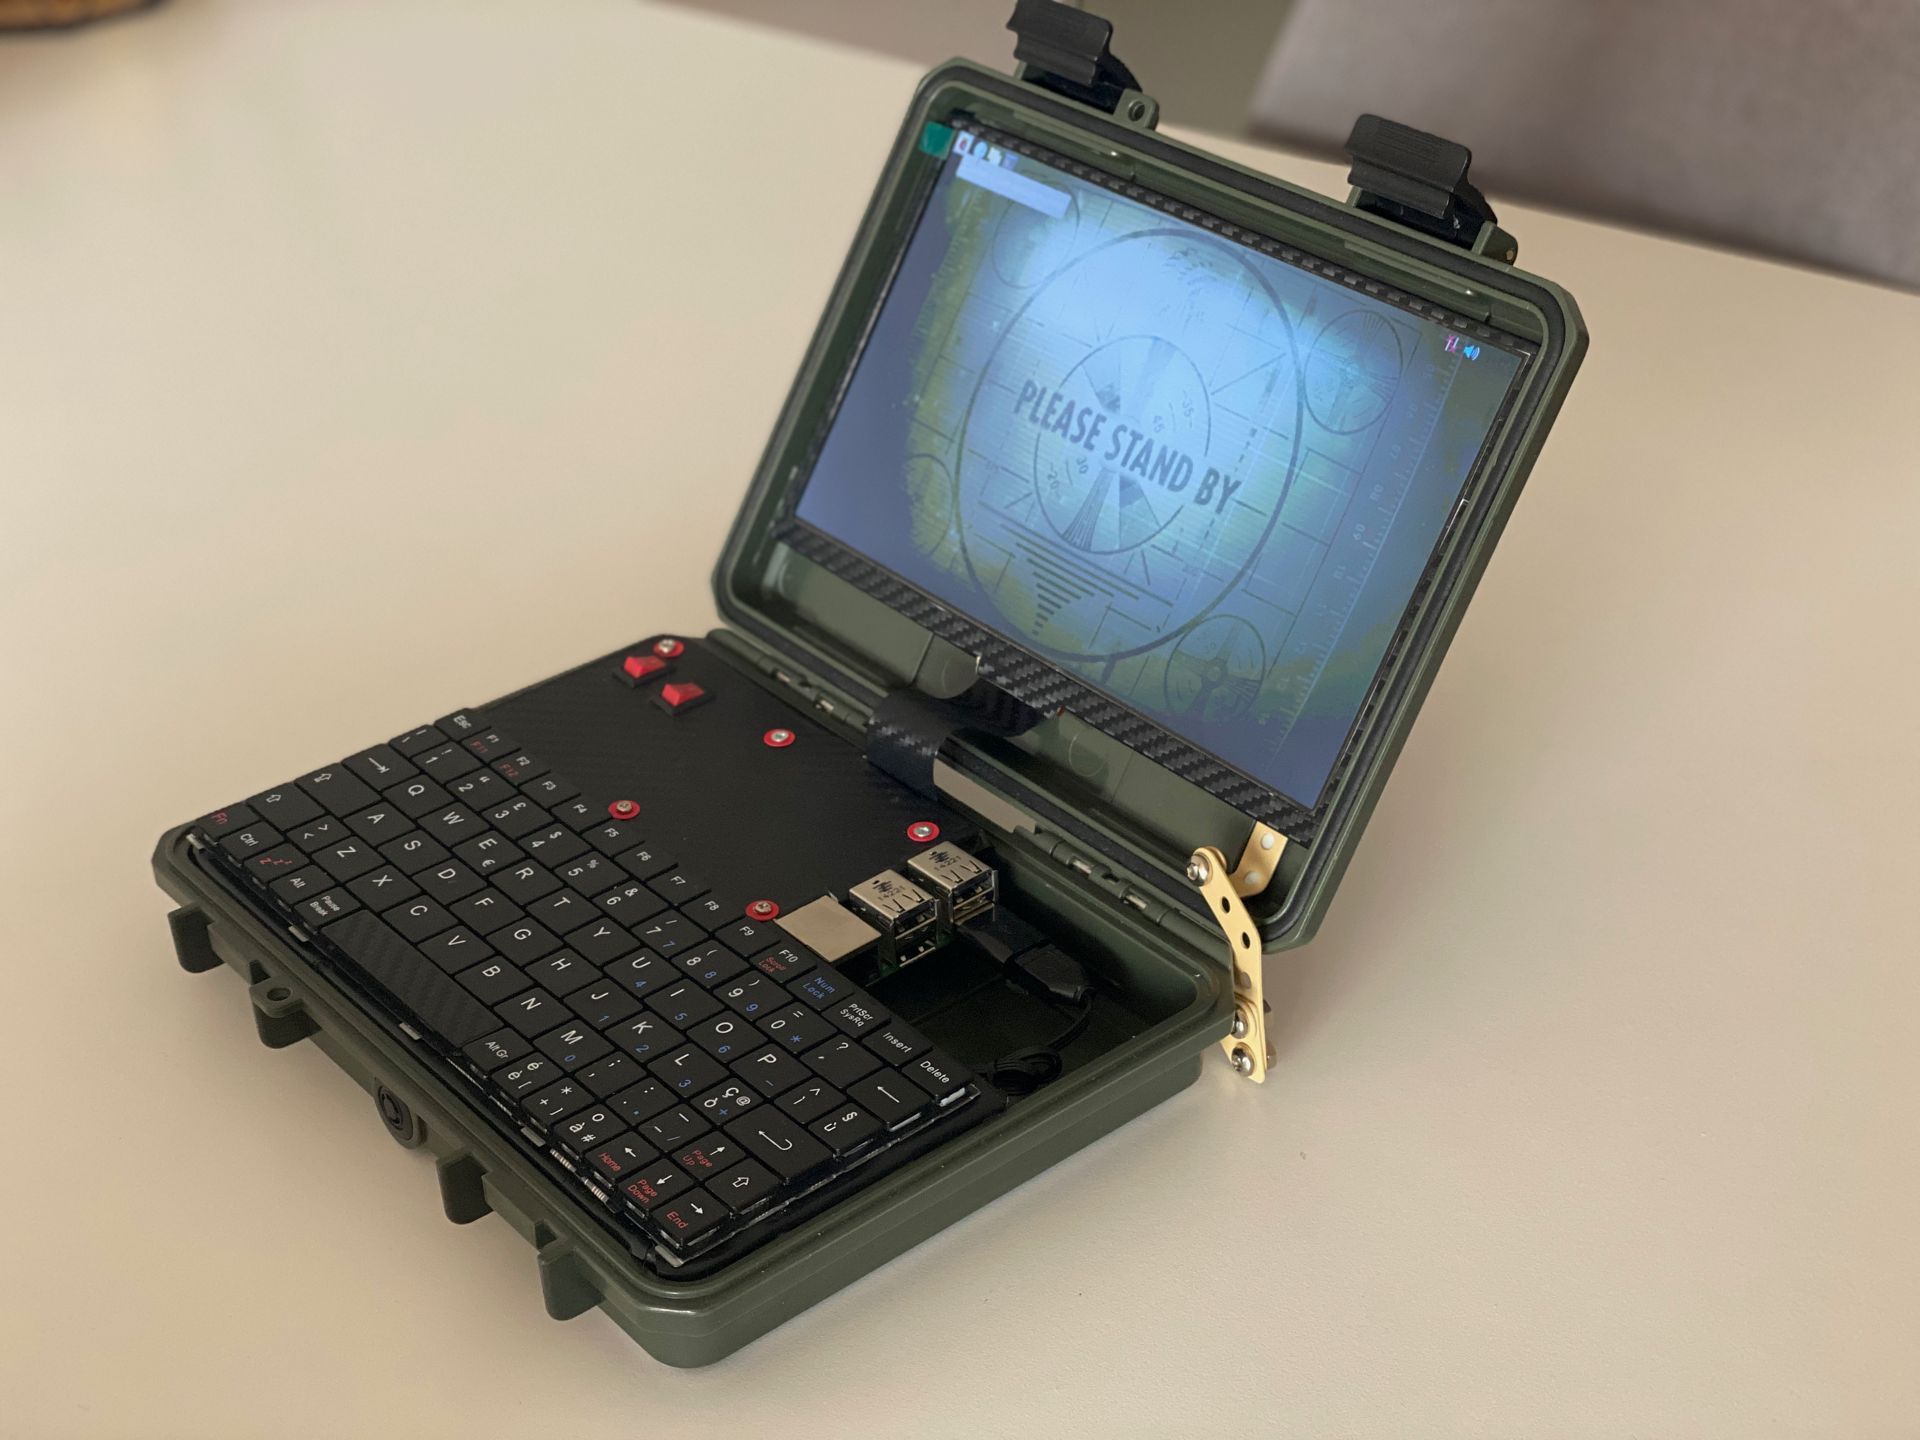
About Raspberry Pi Laptop I'm building
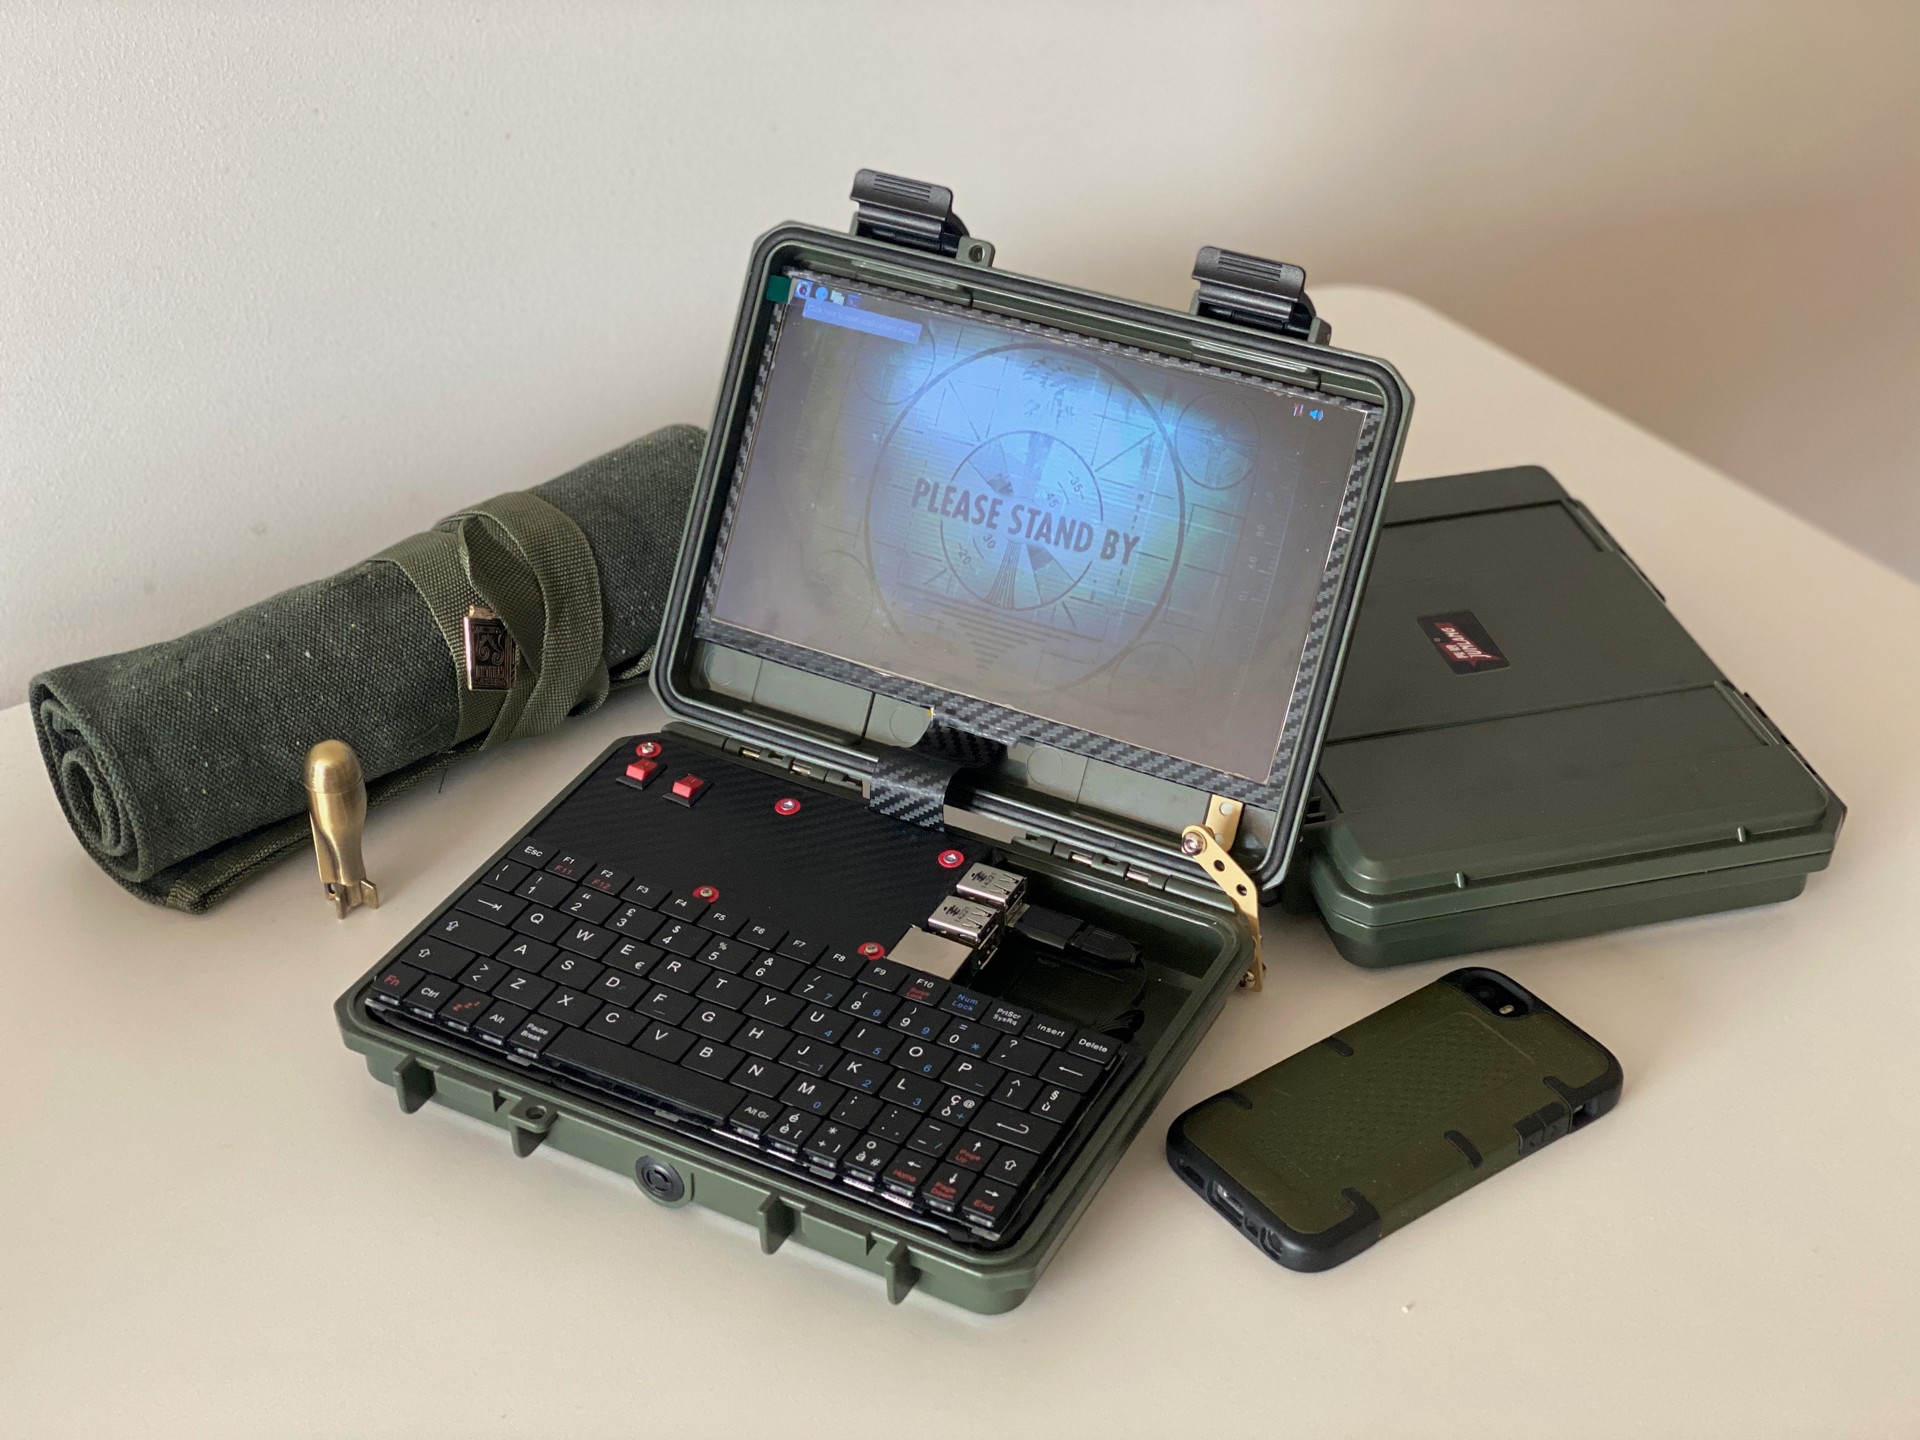
Raspberry Pi Laptop and other militarish stuff
Let me tell you about that Raspberry Pi Laptop (or Cyberdeck or even Tactical Terminal) project I'm working on for quite some time. Let's call it Militarish Pi. At this stage, build took around 6 months (≈10 hours of prototyping, ≈20 hours of searching for the right parts, ≈4350 hours of waiting for parts to arrive). Now waiting for more parts, so before it takes another 6 months I probably need to write something about it.
Inspirations
I have this itch to build a laptop for a long time. In childhood, I've found a broken Texas Instruments Extensa (pic below) and wasted a lot of time trying to fix it. Without any knowledge about computers of course. As you might guess it was a total failure. But since then I have this urge to build a laptop. The one I'm talking about today is the fourth attempt, and the only successful/kindof completed.
Another inspiration for me was epic DRS - LXI. It just looks cool. So I've decided that my new build should look military-ish as well.
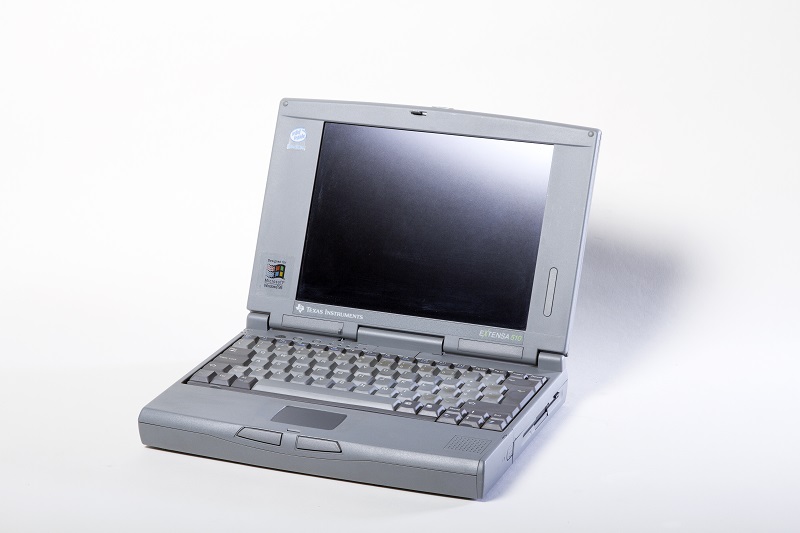
Texas Instruments Extensa 510
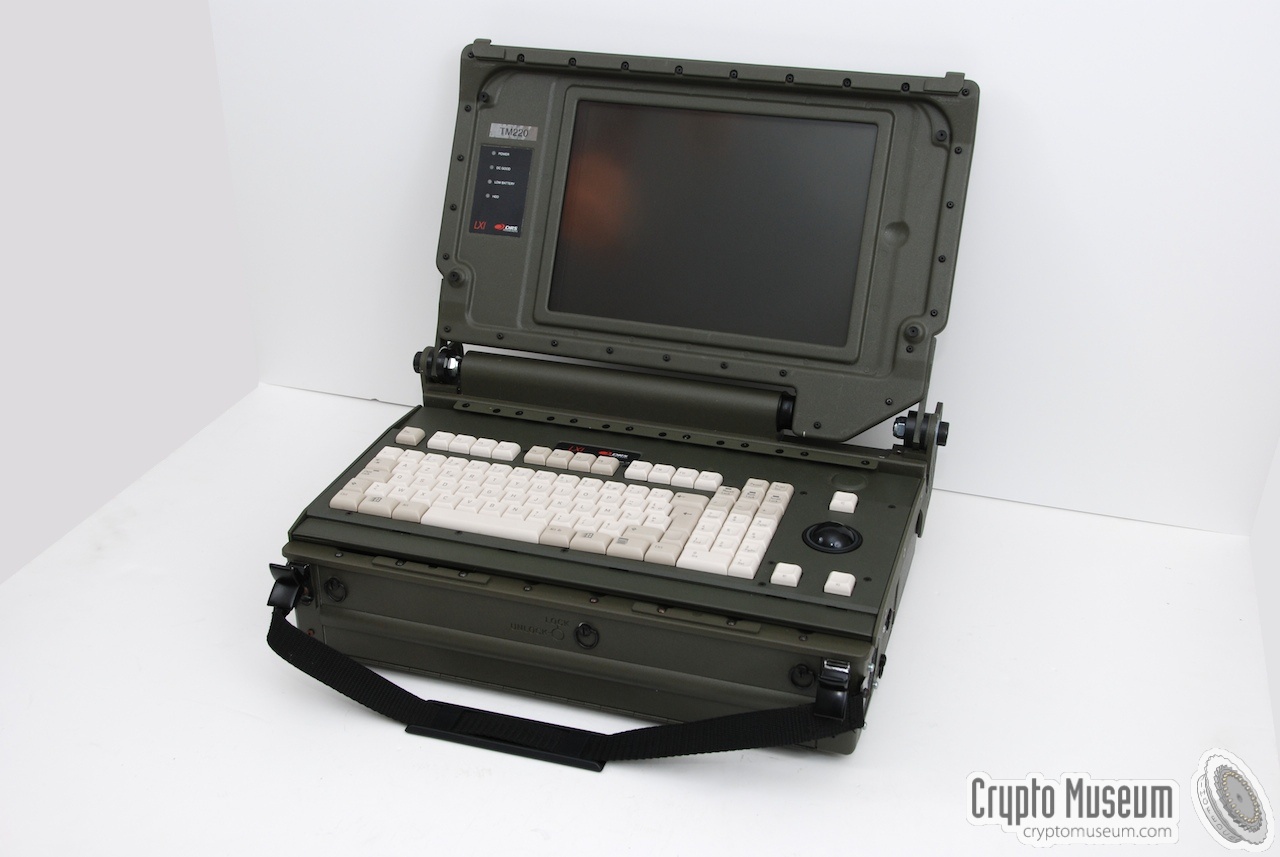
DRS - LXI
If you check r/cyberDeck/ you will see that building custom, Raspberry Pi based portable devices (inspired by Cyberpunk fiction, Cyberdecks) is a thing now. People are building great things there and gave me a lot of inspiration. The main trend nowdays is to remix Raspberry Pi Recovery Kit by back7.co (blueprints are provided by the author Jay Doscher). By the way, my build was recognized by Jay himself!
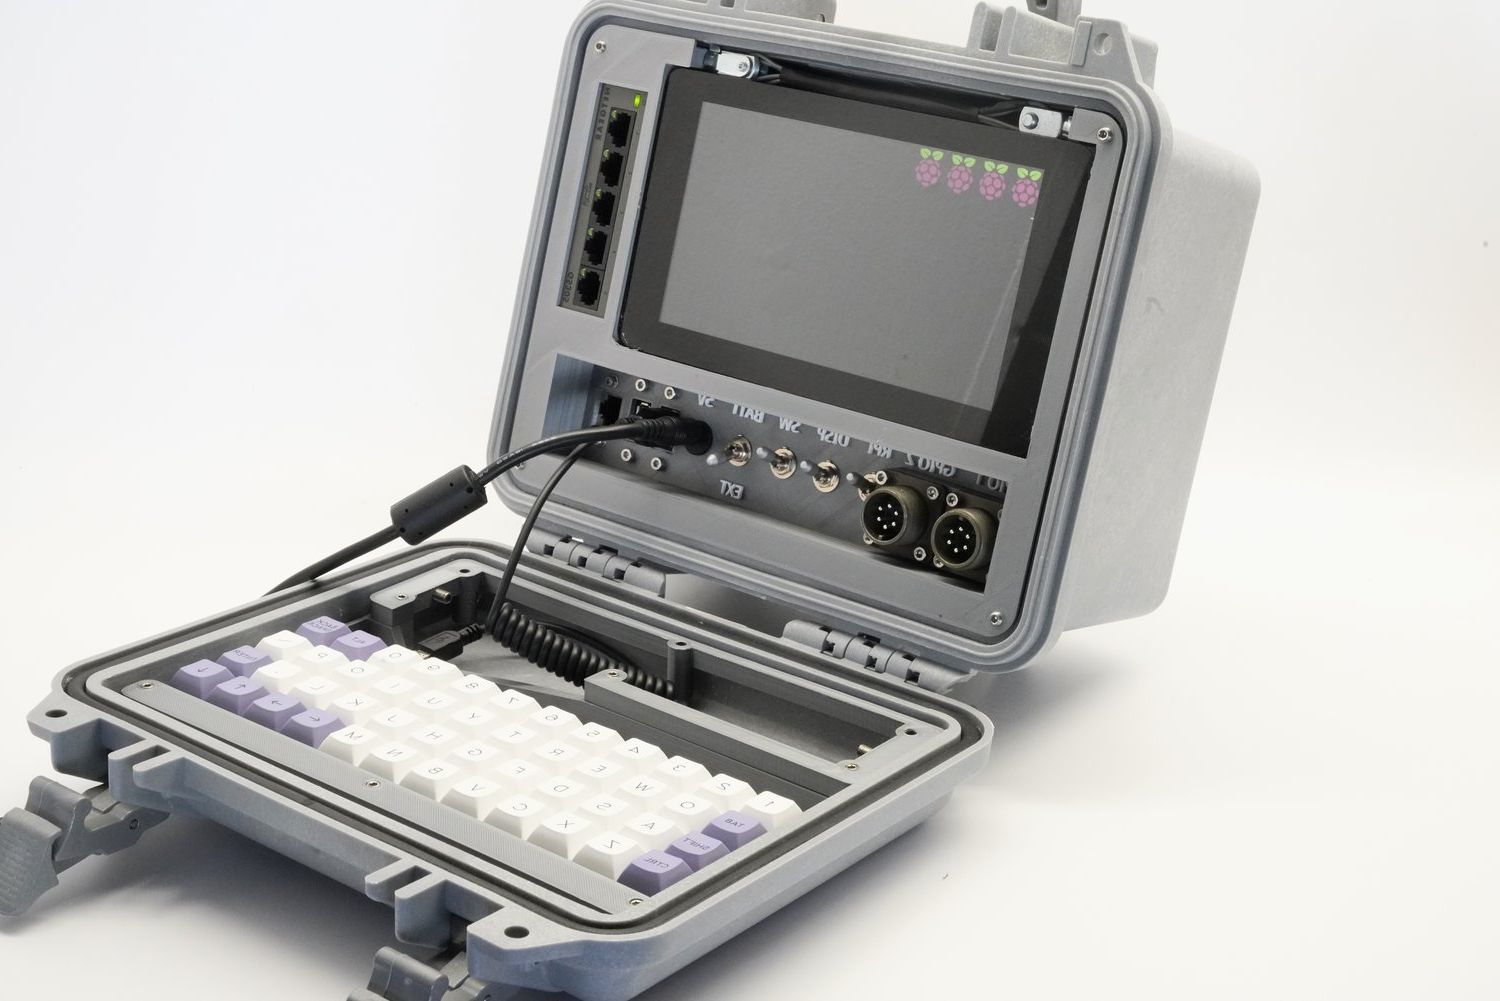
The Famous Raspberry Pi Recovery Kit
I wanted to engineer something myself, so I've decided that I want the following distinctions from the famous Raspberry Pi Recovery Kit:
- Much cheaper price - mainly because I've ordered everything on Aliexpress delivery times was very long. But the final price is less then 100€ (Raspberry excluded).
- Simpler build - no 3d printing required and soldering is minimal. And it's very simple to assemble. The trickiest part was to find the right parts.
- Bigger screen - also I hate touch screens, so no touch either.
- "Thinner" case - I'm not trying to do a MacBook Air here, but want something kind of more portable. Actually, it brings a lot of challenges
- Direct access to GPIOs (will be achieved in the next phase).
- Need to look more Militarish !!111
Intro
First, if you just want the laptop, and are not interested in the building process itself, there might be other options:
- If you want a cheap laptop - just buy used one
- If you want a tough laptop - just buy used Panasonic Thoughbook
- If you want a tough, pocket-size laptop - just buy GPD MicroPC
- If you want a military-grade laptop - just buy Getac
- If you want a portable Raspberry Pi - just buy nexdock
- If you want a modular laptop - just buy Kano
- If you want an opensource and modular laptop - just buy MNT Reform
- If you want an uniq retro looking device - just buy DevTerm
- If you want to create and hack things together - please continue to read ;)

Left view
Right view
Bill of materials
The current total price of components is around 100€. Of course, I've wasted much more money buying surplus parts that do not fit, but you can avoid my mistakes:
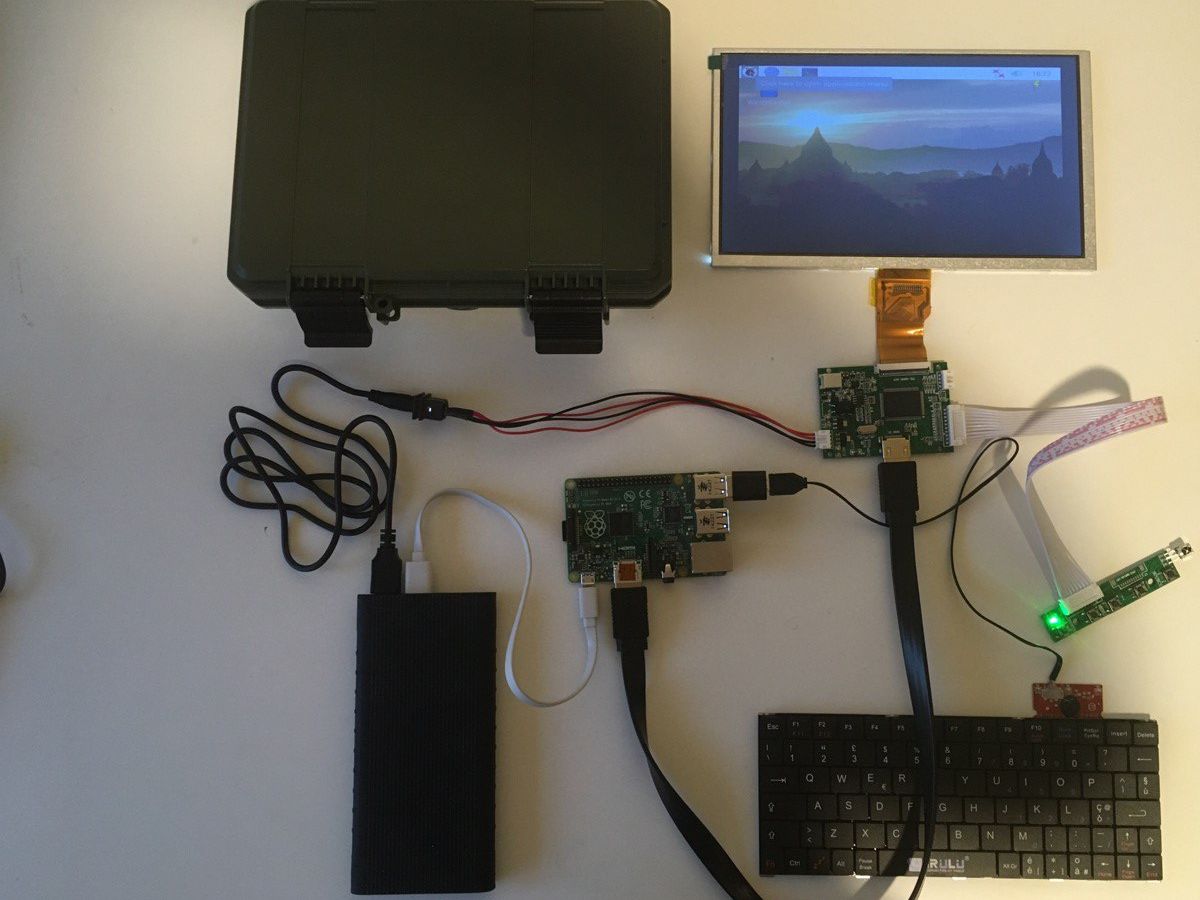
Just got the first parts!
Core
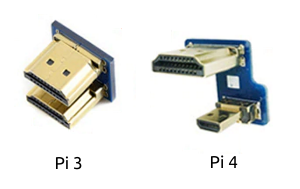
I've decided to use Raspberry Pi 3 because Raspberry Pi 4 has power issues and requires active cooling. But mostly because I have lots of 1s and 3s laying around which I can scratch, break and fry during the prototype phase. As described in follow up post upgrade to 4 is possible using different HDMI connectors:
Case
210x150mm Is The Perfect Size. 210mm is the exact length of 9" display. The mini keyboard length is 205mm. At 150mm width you can fit Raspberry Pi (56mm) and Power Bank (72mm) leaving 22mm for wiring and connectors. And without any surplus space left.
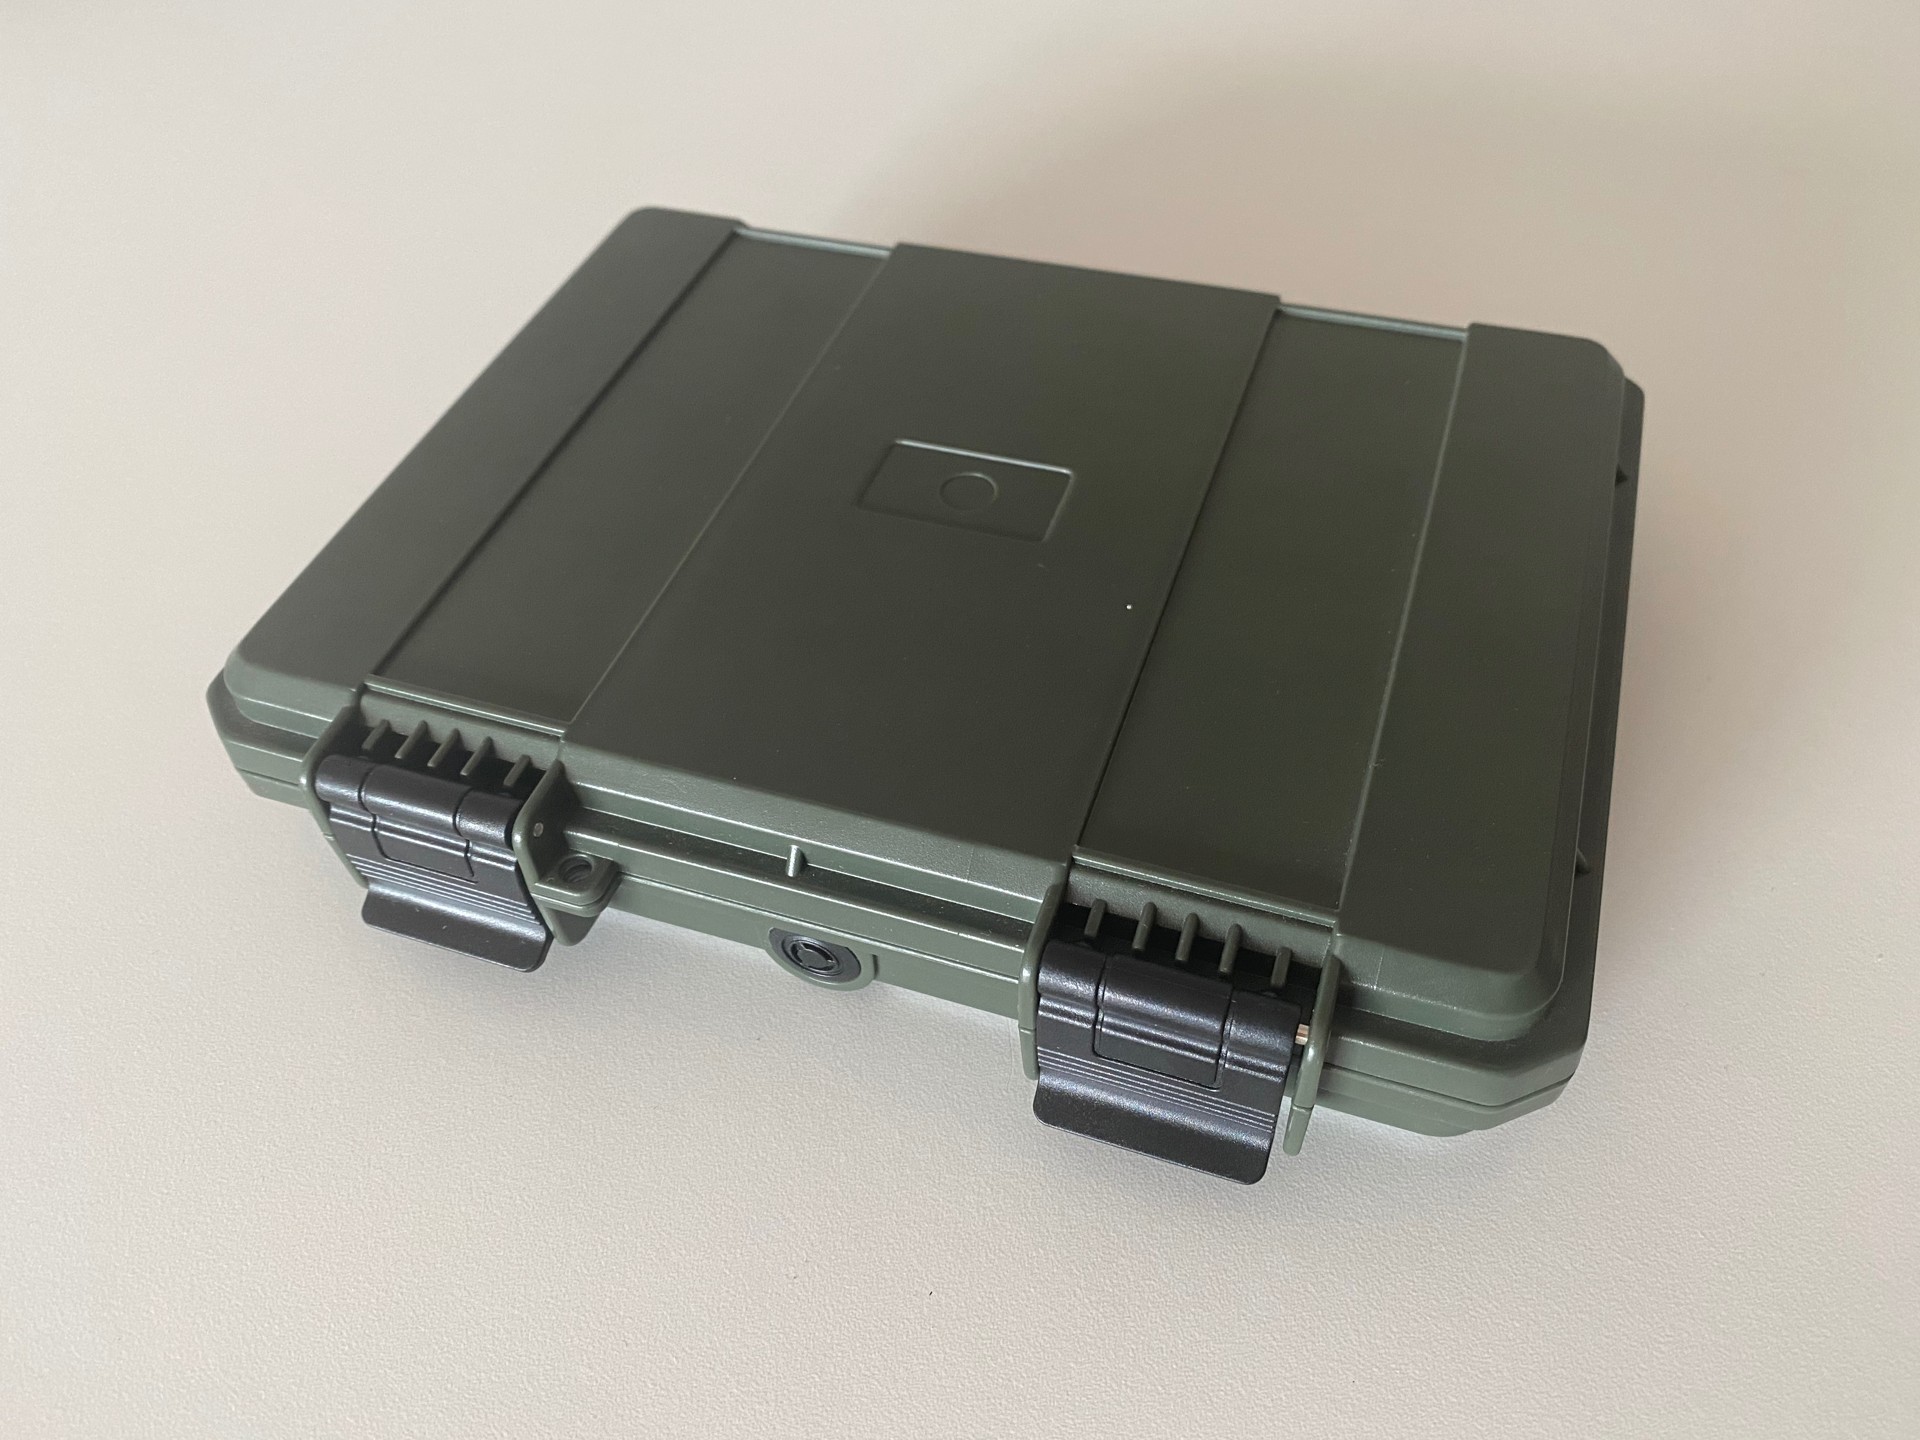
Case closed
As you can see display fits perfectly in this case, and I don't even need to fasten it! It reliably holds on ledges inside the case:
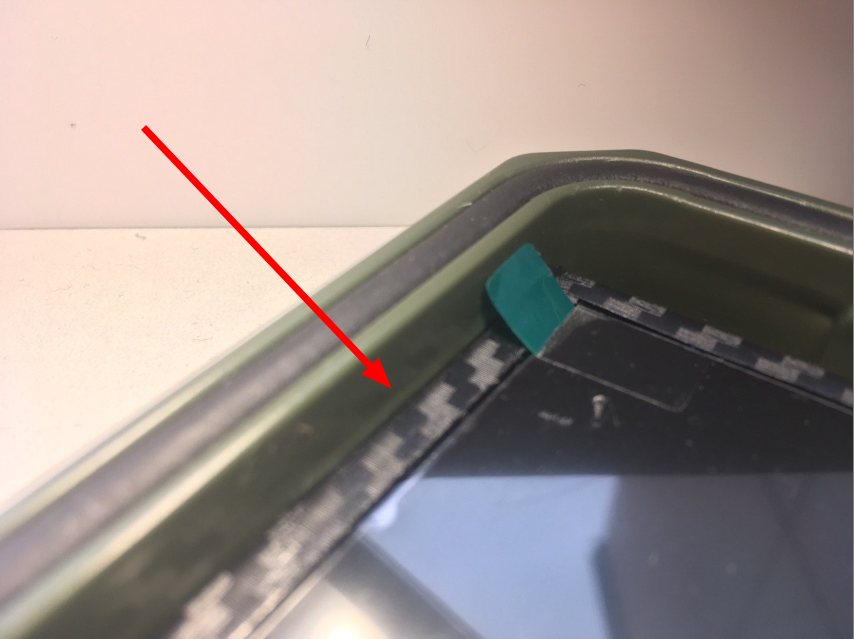
Display holds by ledge
The full dimensions of case are 228x182x46mm outer and 210x150x38mm inner. The main challenge is that you have very limited vertical space - 38mm. That is a 15mm in top lid and 23mm in the bottom. Usually, for Cyberdecks, USB extenders and panel mounts are used:
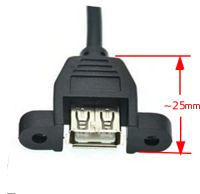
Unfortunately, I can't afford USB panel mounts, because 25mm>23mm. So I've decided to not use USB extenders at all:
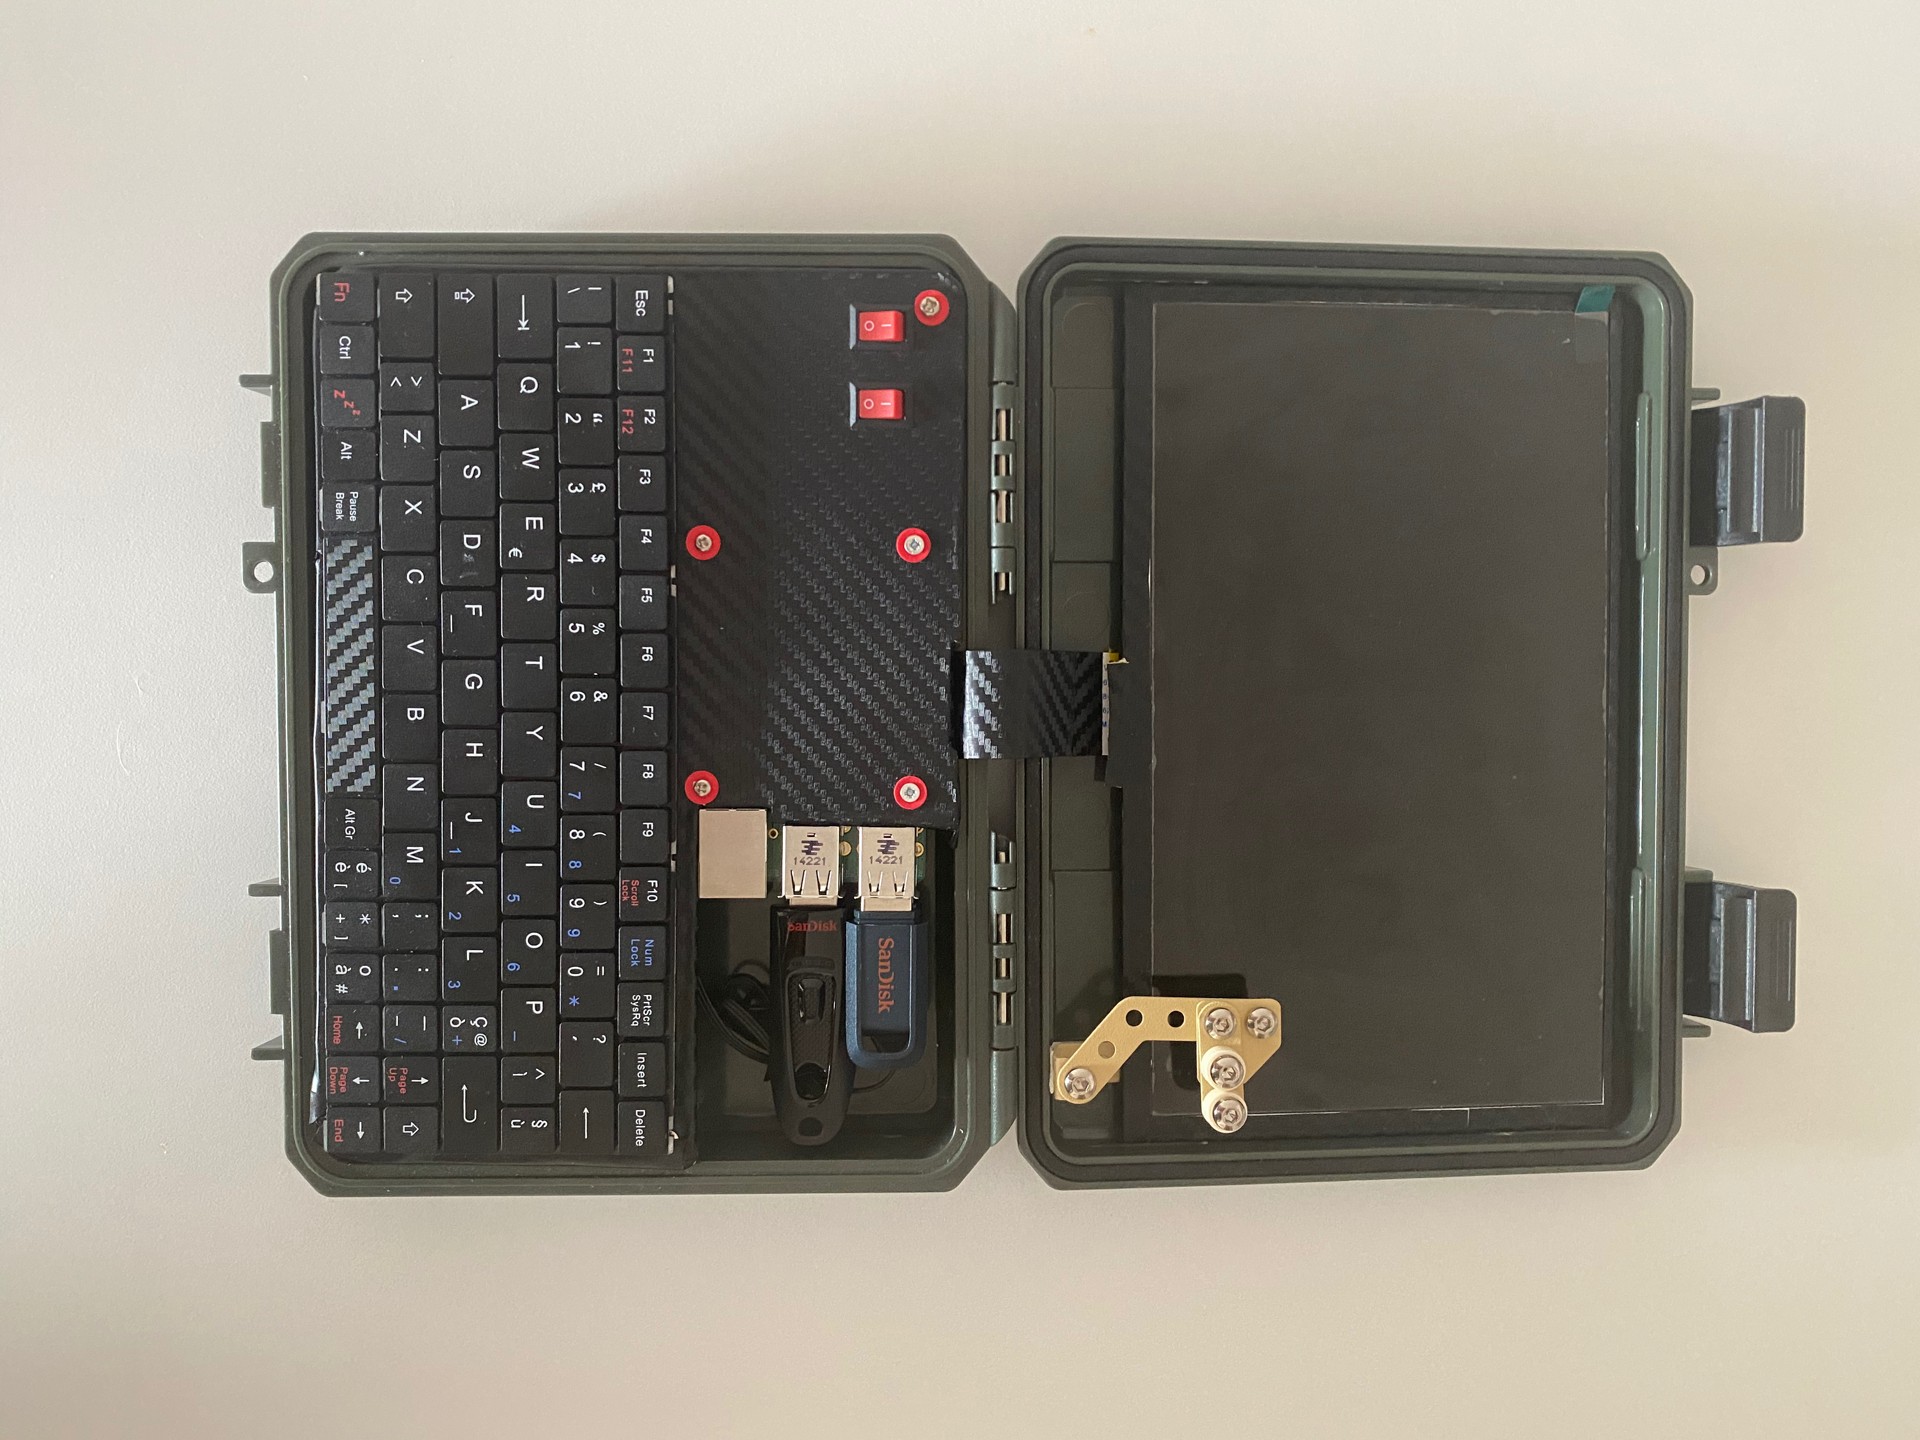
Top view
The case is IP67 waterproof and to leave it so, I decided not to drill holes for USB and LAN ports. Raspberry is located in the center and on the right is the space for USB drives. This made the build much simpler. As a bonus USBs could stay inside while the lid is closed. Also, waterproof connectors are very expensive, so by this decision, I've saved a bunch of money.
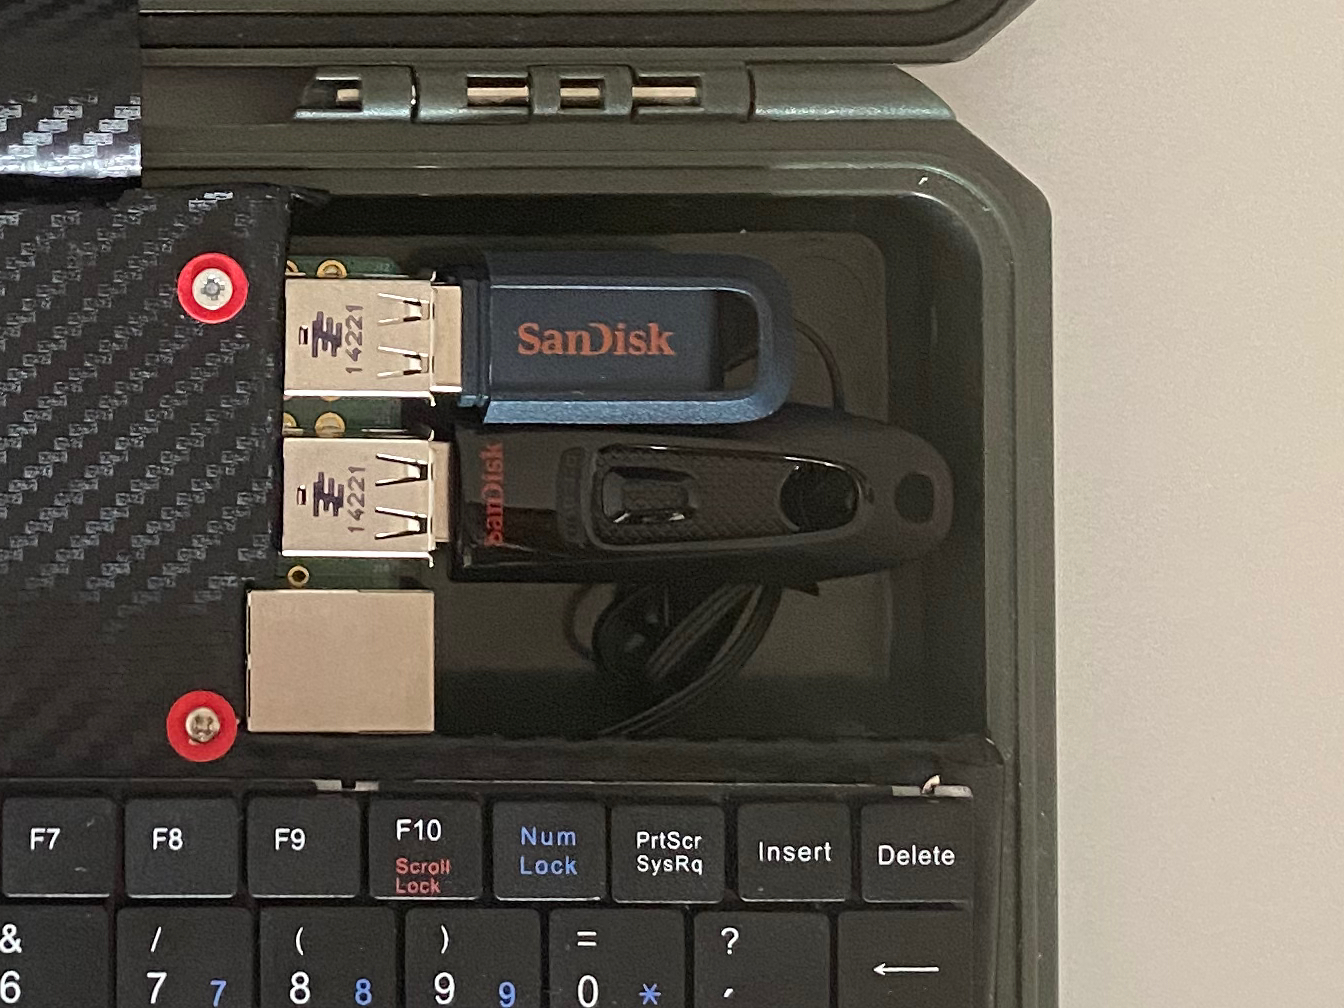
Usb when case closed
Display
There are two options for connecting 9" display to Raspberry:
- Using GPIO
- Using HDMI and driver board
I wanted to leave GPIO free for further extensions so I've picked a driver board:
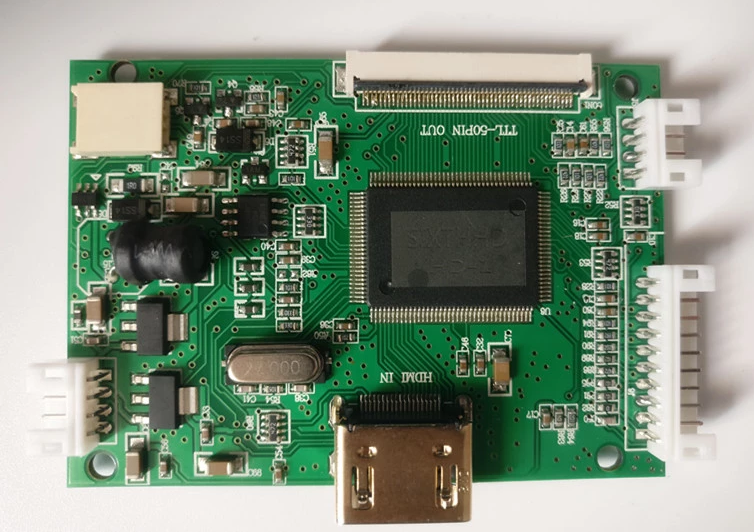
Display driver board
Board connects to display using 50pin flat cable. Board sits under Raspberry Pi and connects via HDMI:
Chassis
The simplest design is a top plate + standoffs:
Chassis top view
Usually, I do prototypes from old credit cards1 or pvc foam sheets2. The main benefit is that those materials hold screws well and you can easily adapt it by exacto knife or drill, even after everything is assembled.
Chassis bottom view
As you might notice, a lot of carbon-looking film sticker was used to make everything look nicer. When the build is completed and all details are final I might order the plate laser-cut from real carbon.
The maximum height I could fit in the case was 23mm (note that 23mm standoffs are rare beasts, but you can easily achieve it by combining more common 8mm+15mm or 20mm+3mm standoffs).
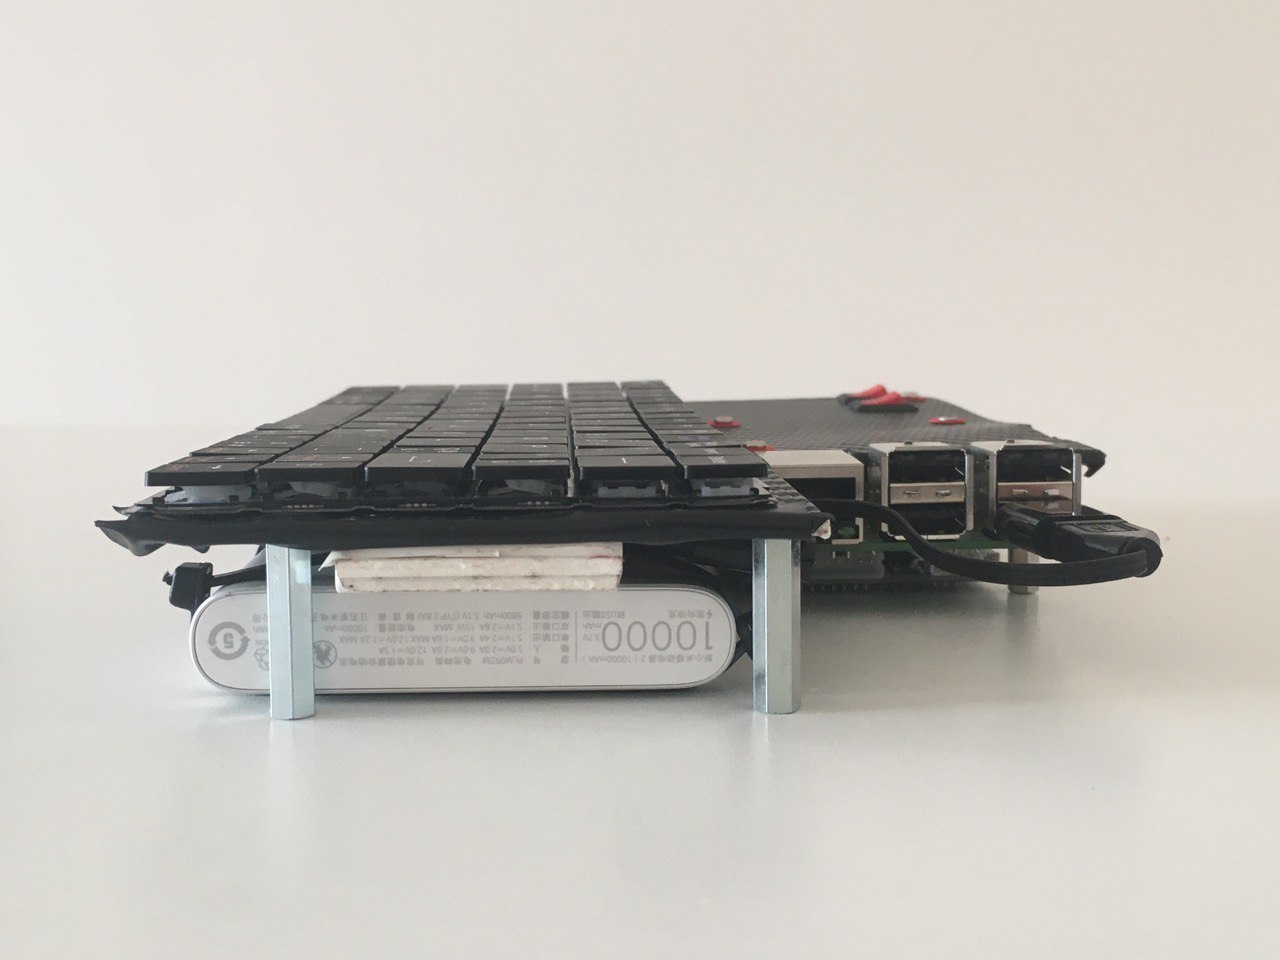
Chassis thickness
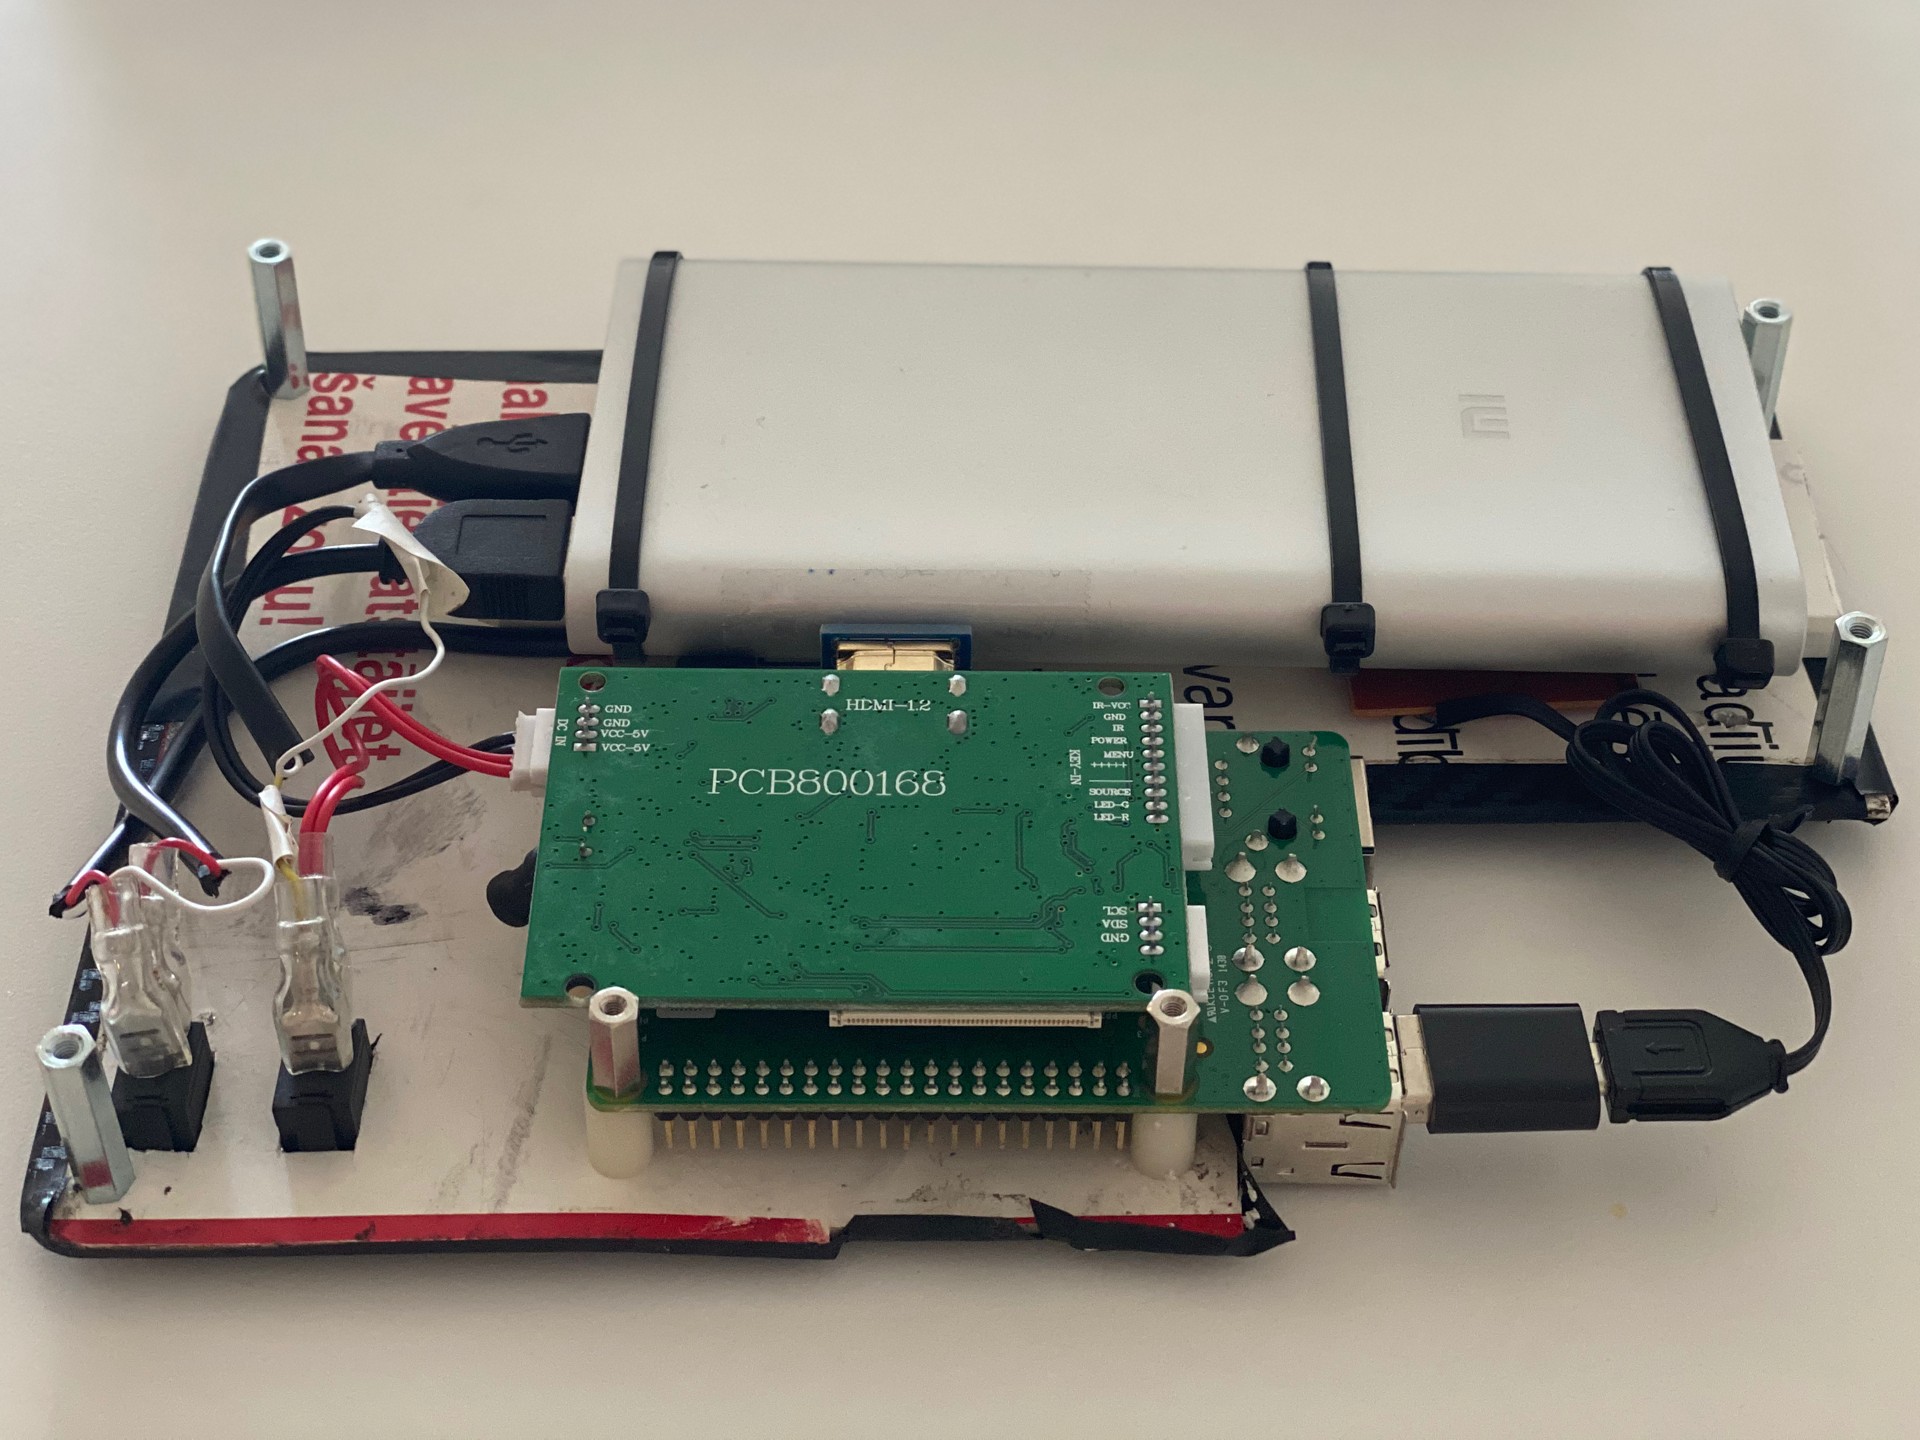
Let me explain what is what:
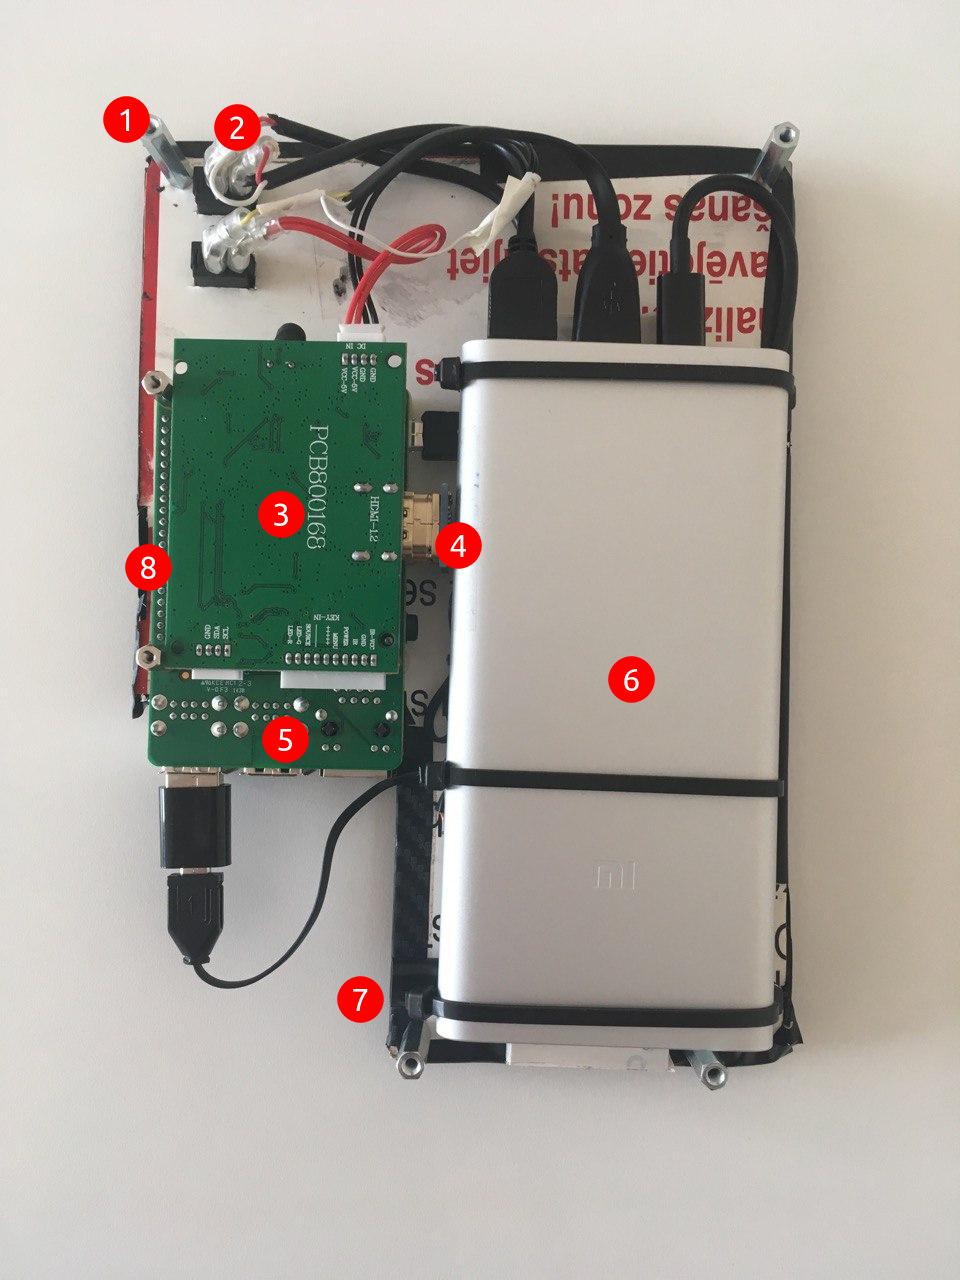
Chassis explanation
- 23mm standoffs
- Raspberry and display power switches
- Display driver board
- HDMI-HDMI connector
- Raspberry Pi
- Power bank
- Charger input
- Display flat cable connects here
Hinge
The hinge was actually the trickiest part. The display is a bit heavy. According to the lever principle, you need a lot of force to keep it at ≈90 angle while the lid is open.
The simplest solution would be to drill a couple of holes on both sides and hold it by chain or furniture hinge. But I've decided to keep my case waterproof - so no drilling. Glue is also no option as it has not enough force to keep the weight.
The second solution would be to fit a laptop hinge from spare parts. I've spent a lot of time trying to find one that will fit into my case, but unfortunately, there's none.
As in many other cases, Polish Contructor3 comes to the rescue! I'm not sure how it is actually called, but here we call it Polish Contructor:

The Polish Constructor flies to the rescue!
It provides different useful metal shapes which you can easily adapt by pilers or file. Metal is surprisingly durable and locknuts included to hold connections secure. Can't say how many times this thing saved us when we needed non-standard parts.
This is one of the cases. So I've built a very simple hinge that holds the display nicely:
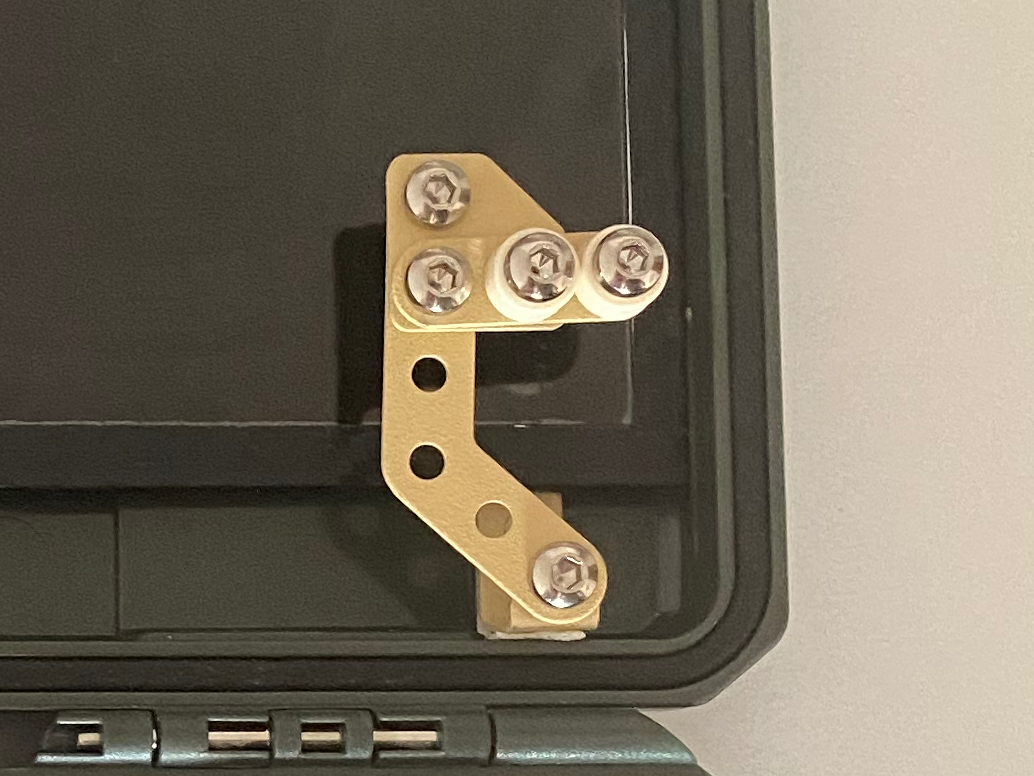
Hinge when lid closed
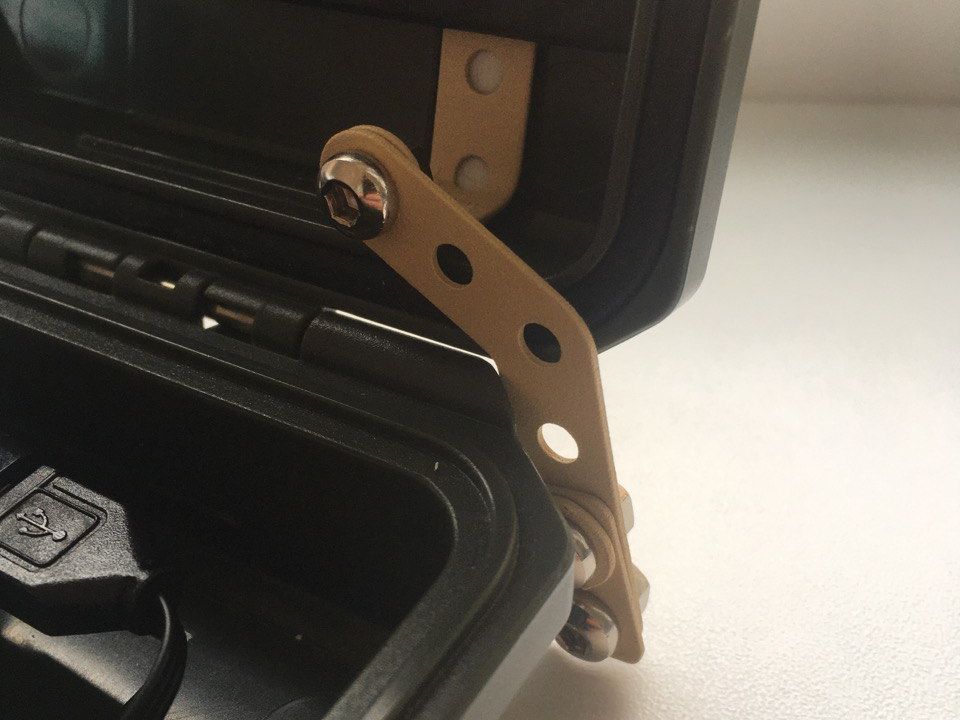
Hinge when lid open
Automatik!
Keyboard
There are hundreds of portable keyboards available, but finding the right one was much more challenging than I've expected. All these are Bluetooth and require charging. I don't want any wireless in my build.
Another option is to use a laptop keyboard, but most laptops use custom controllers so it is tricky.
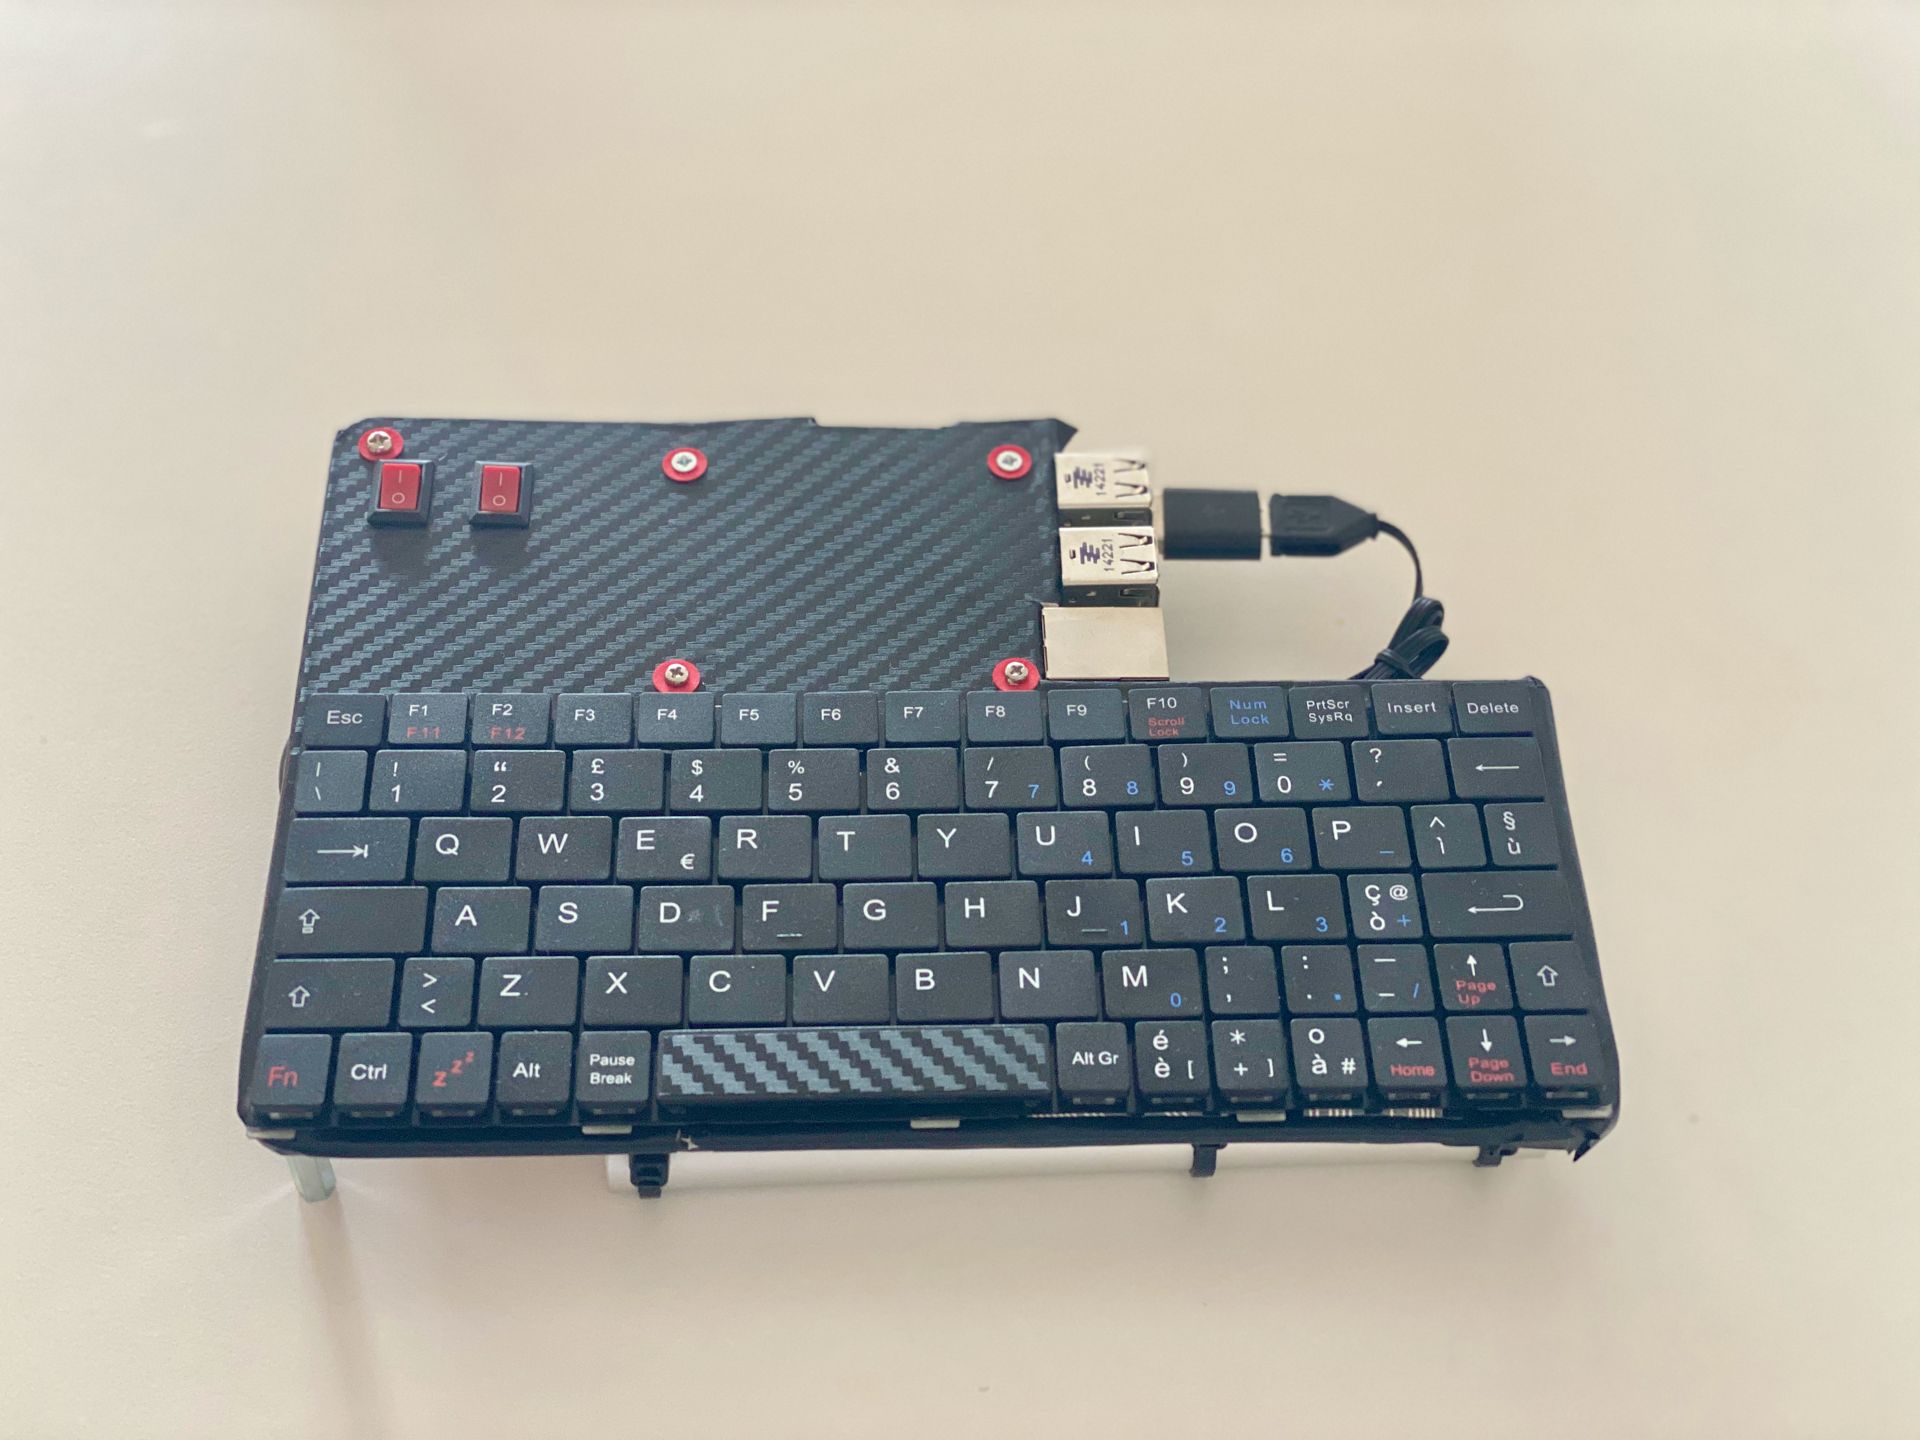
I was lucky to find some discounted tablet cases with a nice USB keyboard to rip out:
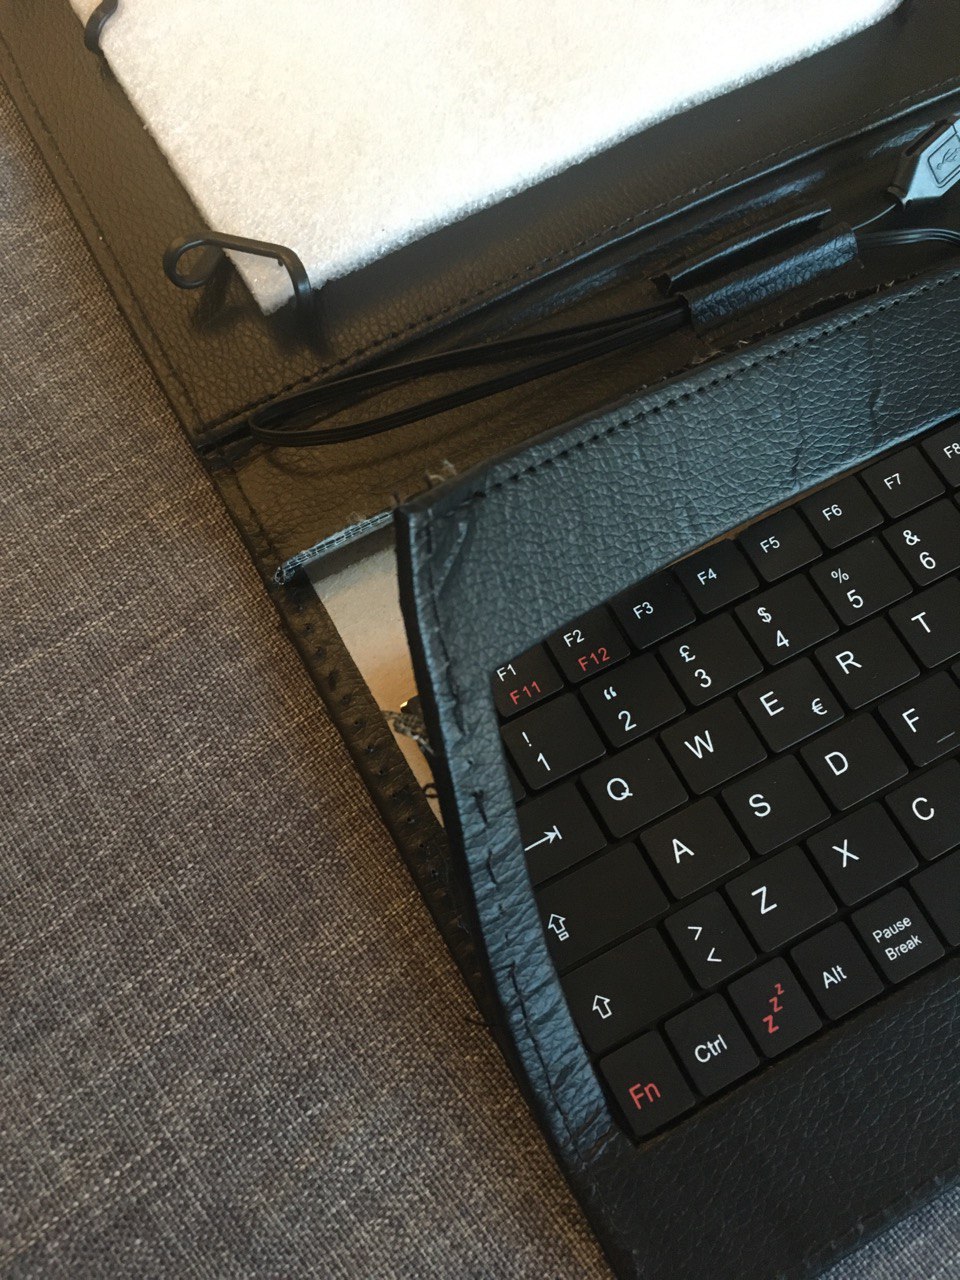
Salvage the keyboard!
Power
It is 10000mAh Mi Power Bank 2S. Charged by cable extender that leads to case opening (right of Raspberry). Holds by plastic ties, which is another great DIY ingredient.
With Raspberry Pi 4, display on 50% brightness and internet browsing over WiFi, laptop works 6+ hours.
The only issue that power status is currently hidden inside the case. Looking for some (light?) sensors to make it available in OS. If you have any ideas - please drop me a word.
Redundancy
Recent events gave me this post-apocalyptic vibe. So if we look at this device from an emergency preparedness perspective - it's all covered.
The part that is most probably to break in the future is the 50pin cable that connects the display and chassis. Its not broke until now, seems pretty robust. Just in case I have around 20 of these cables stored.
All the other parts I have at least 2 units. And as I said before I have dozens of Raspberry Pi's lying around.
Laptop and spare parts will be stored in metal fire/water/emp-proof 50 cal ammo case:
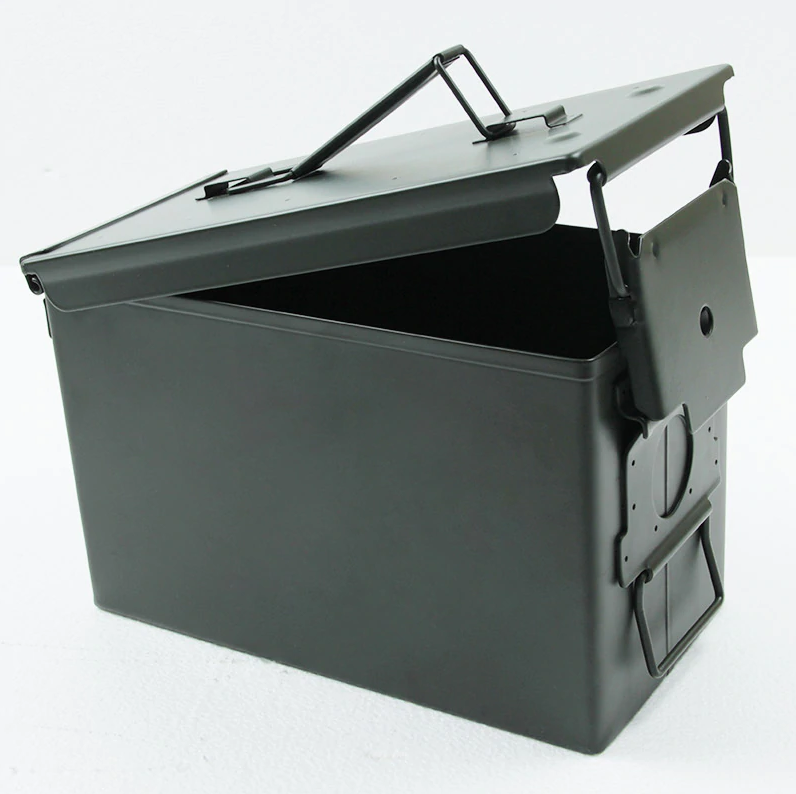
50 Cal Metal Ammo Case
So I feel kind of prepared :)
Software
The first choice for robust USB drive might be CORSAIR Flash Survivor. It just looks tough. But looks are deceiving, because actually, it is very fragile. Plus it is expensive and does not fit in my case. So I've opted for Sandisk Ultra Trek 128gb, which is advertised as "shock/water/dust/scratch-resistant", "Withstands drops up to 5m" and "Weathers extreme conditions from 0° C-100° C". For additional protection I will store it in an aluminum container:
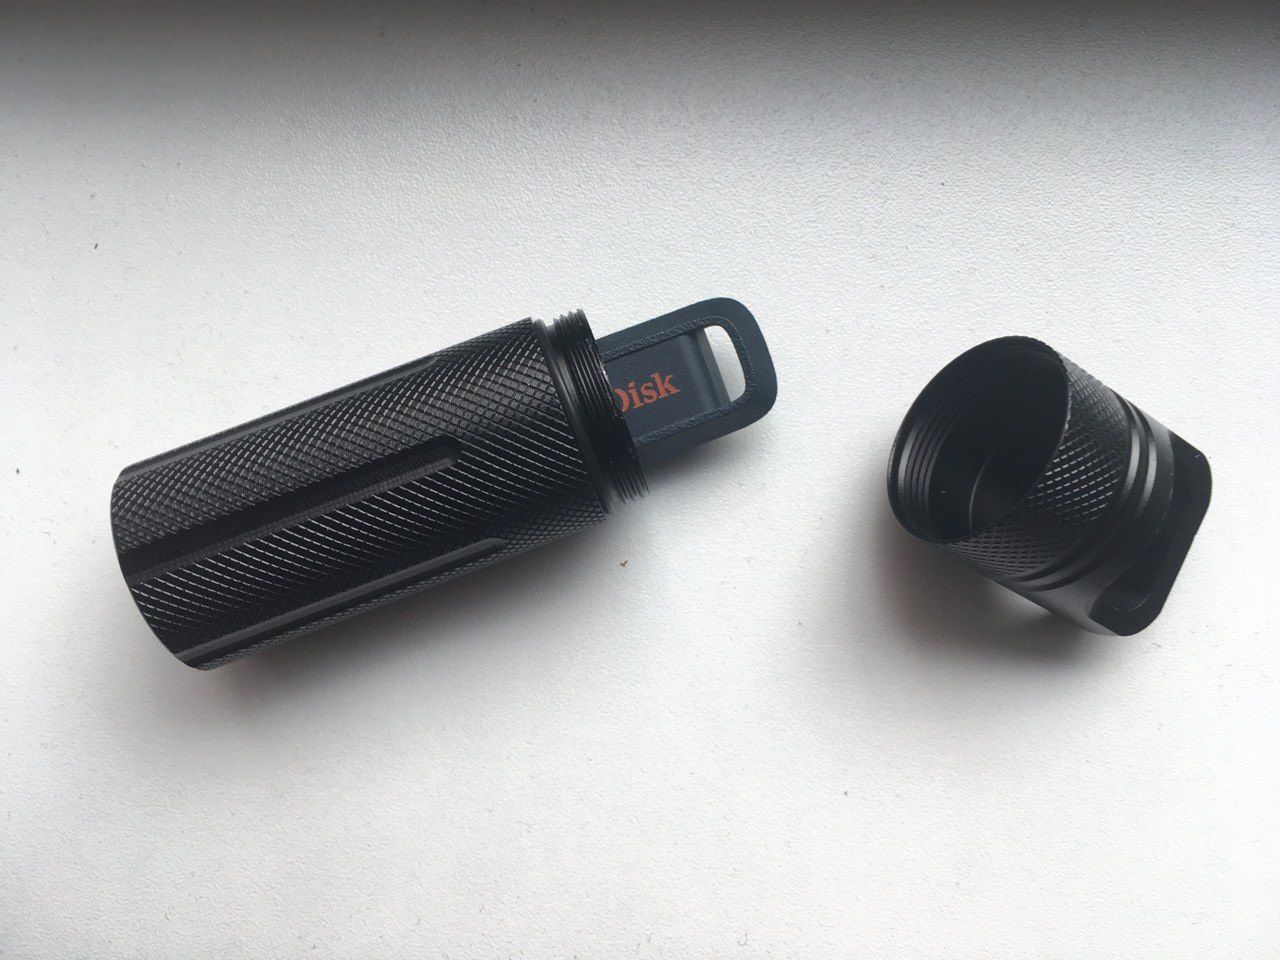
Additional protection for USB drive
Just in case USB drive contains a lot of fiction books, "FM 3-05.70", "Where There Is No Doctor", "The Knowledge by Dr. Lewis Dartnell", "ps-survival library", WHO AWaRe antibiotic book and preparedness pdfs from local gov site. And dumps of Wiki and Arch Wiki of course.
Also Linux version of Organic Maps with lots of maps downloaded for offline use.
For more check r/PrepperFileShare/ and r/PostCollapse/.
Next steps
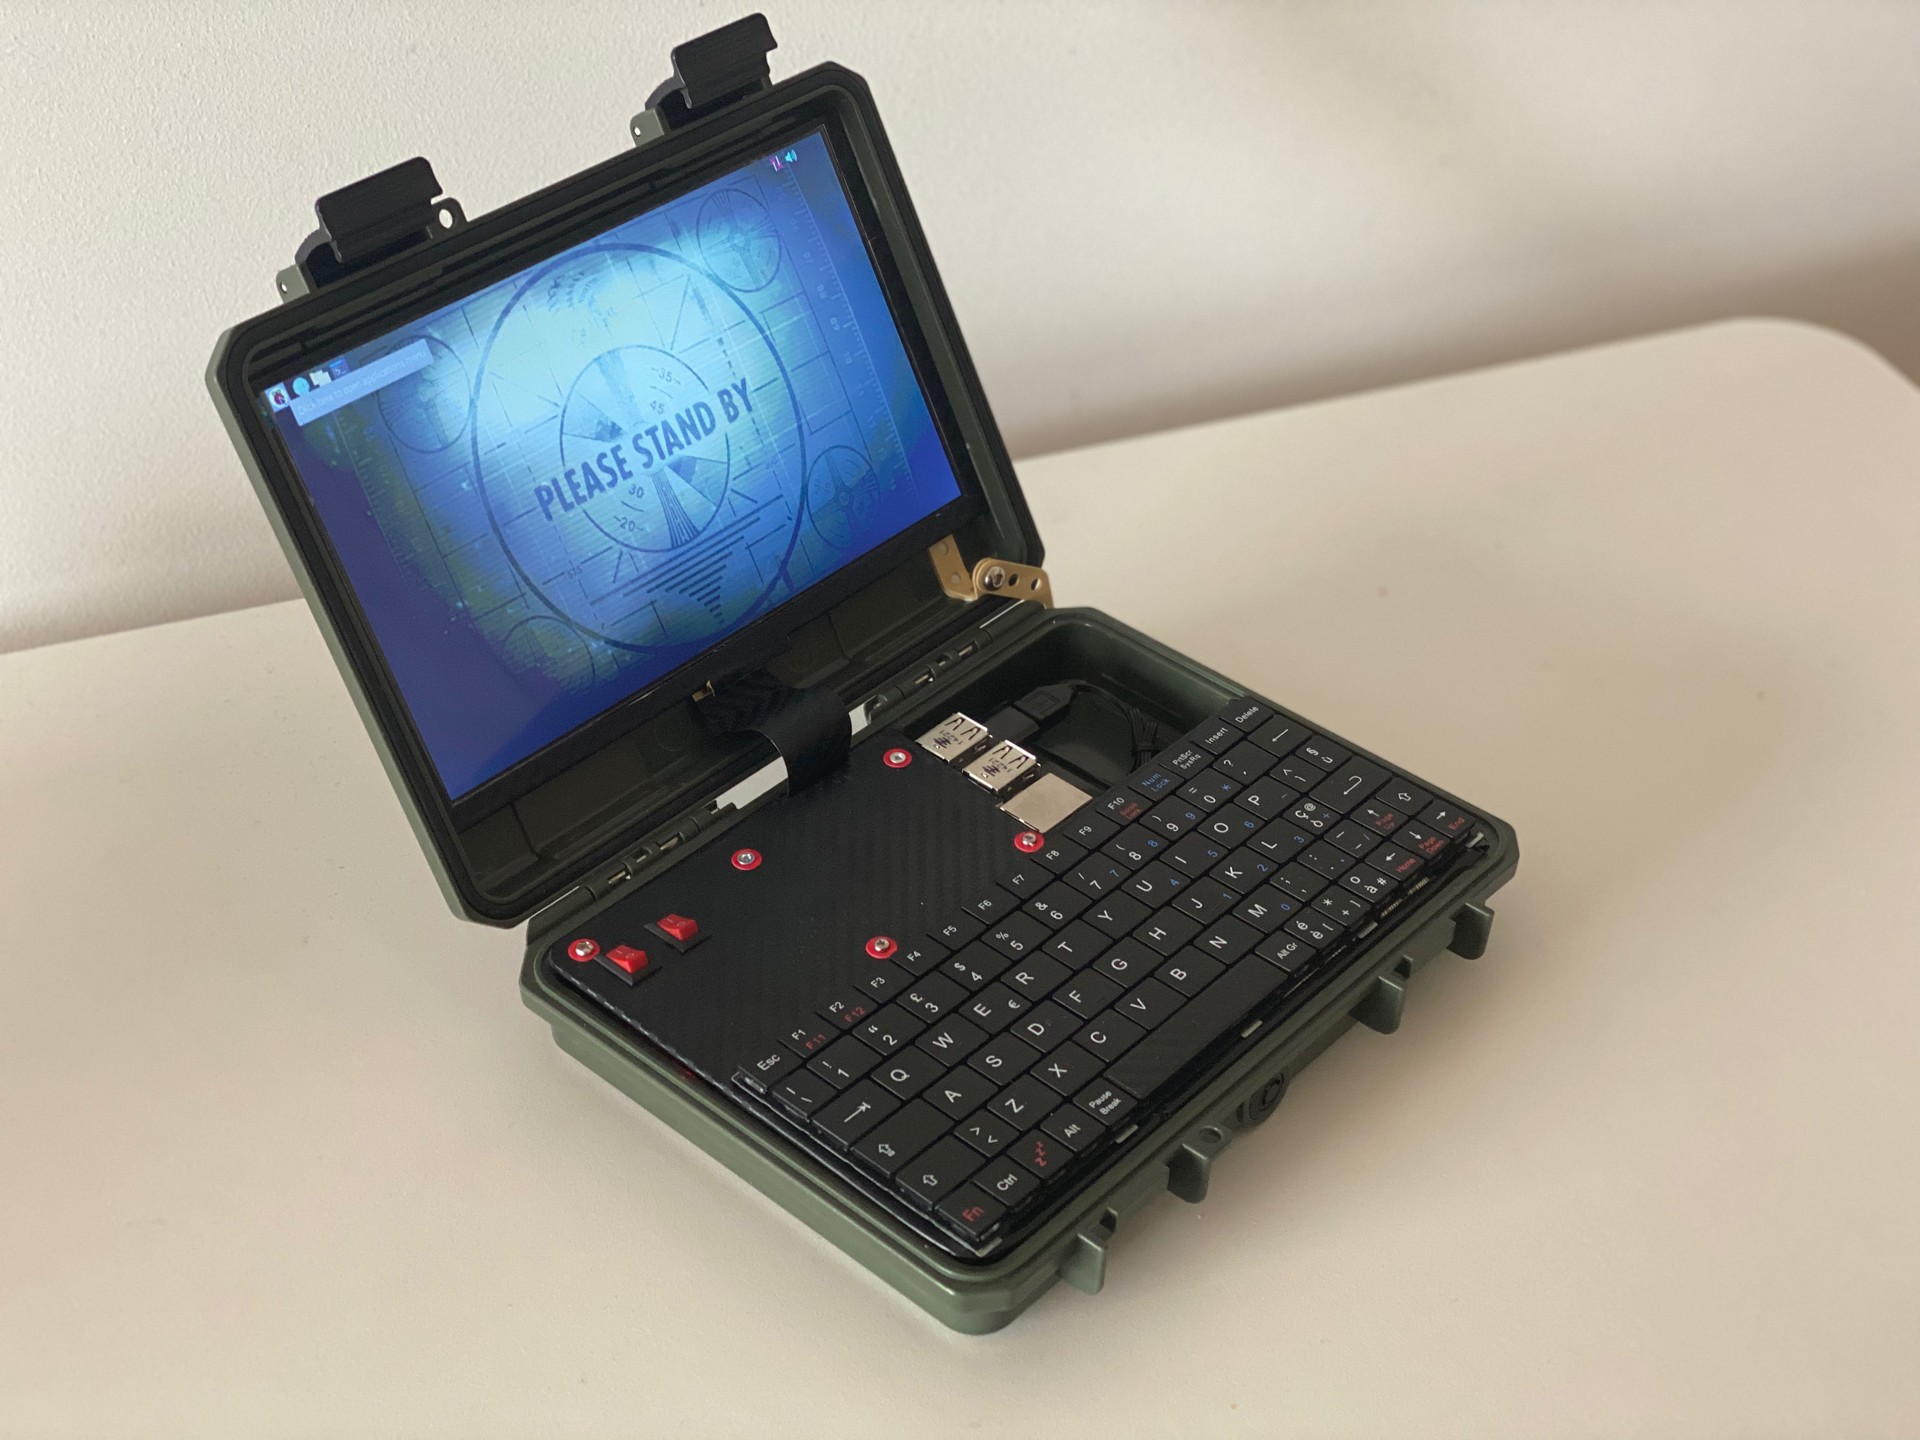
Screen protector is still on, which means that build in progress :)
- Changing microSD card currently require tweezers. Waiting for an extenter to arrive
- There some space left inside the case to put M2 SSD 2242 drive via USB adaptor
- Need to cut plate a bit for a quick GPIO access
- For mouse control I'm waiting for ICSH044A and Teensy 2.0
- Fairing bolts might be an option to easily attach/detach the chassis
- Seeing the charge level of power bank would be nice. Light sensors, maybe? Have any ideas?
Raspberry Pi 4 Update
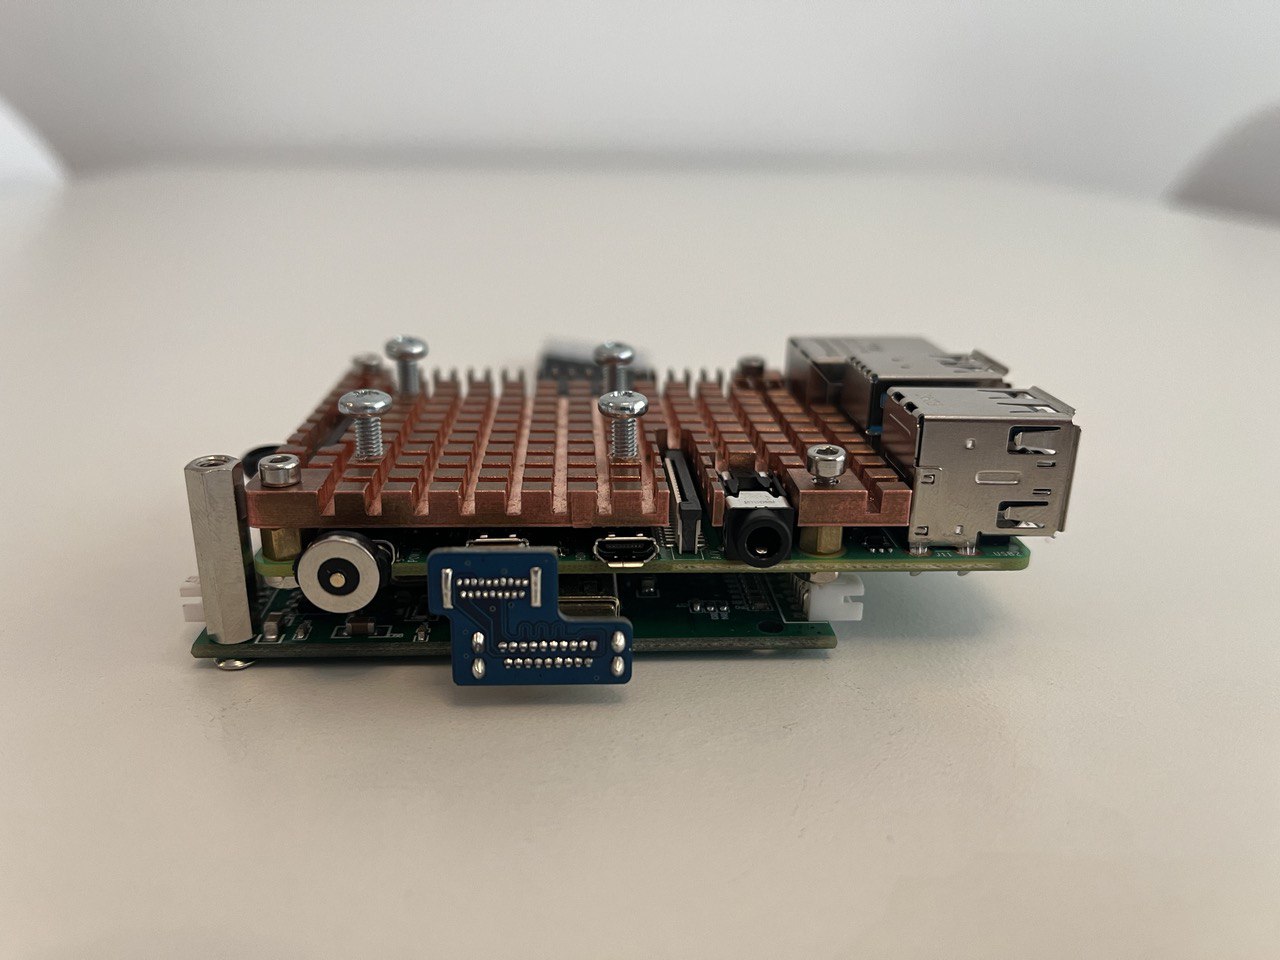
Sandwich with Raspberry Pi 4
Continuing the build with Raspberry Pi 4, trackball and SSD in → STATUS UPDATE 1

Comments are on Reddit and HACKADAY
#DIY #raspberrypi #cyberdeck #linux #survival #gear #prepper #MilitarishAesthetic
-
When you run out of credit cards, you just go to the nearest mall and get some free "loyalty cards". ↩
-
When you run out of pvc foam sheets you just go to the nearest construction site. Usually, they have tons of signs what they just throw away, so if you ask nicely you can get an unlimited supply. ↩
-
RogueArcologist points out that it is called Erector in the US and abjq clarifies that is was originally invented by Frank Hornby in Liverpool, so should be called "Liverpudlian Constructor" ↩