Your keyboard needs a Scroll Wheel: a Simple Mod
Let me start with a pretentious statement :). Human brains are pretty fast, computers times faster 1 , but communication speed between two is a disappointing bottleneck. I don't see interfaces like Neuralink in the near future without huge drawbacks, so we are stuck with input devices that have not changed much over the last dozens of years.
When interacting with computers, of course, the mouse is the simplest and most universal way. Or maybe a good touchpad. However if one invests time into learning keyboard shortcuts and tricks, they can do work much much faster. In addition to productivity gains, not touching the mouse (or touchpad) is better in the long run, as wrists will be healthier after 15 years or so.
Even
browsing the web with keyboard
is pretty convenient. Except for one thing - scrolling. Because the mouse wheel feels much more natural and precise control compared with mashing
PgUp
/
PgDown
/
↑
/
↓
buttons.
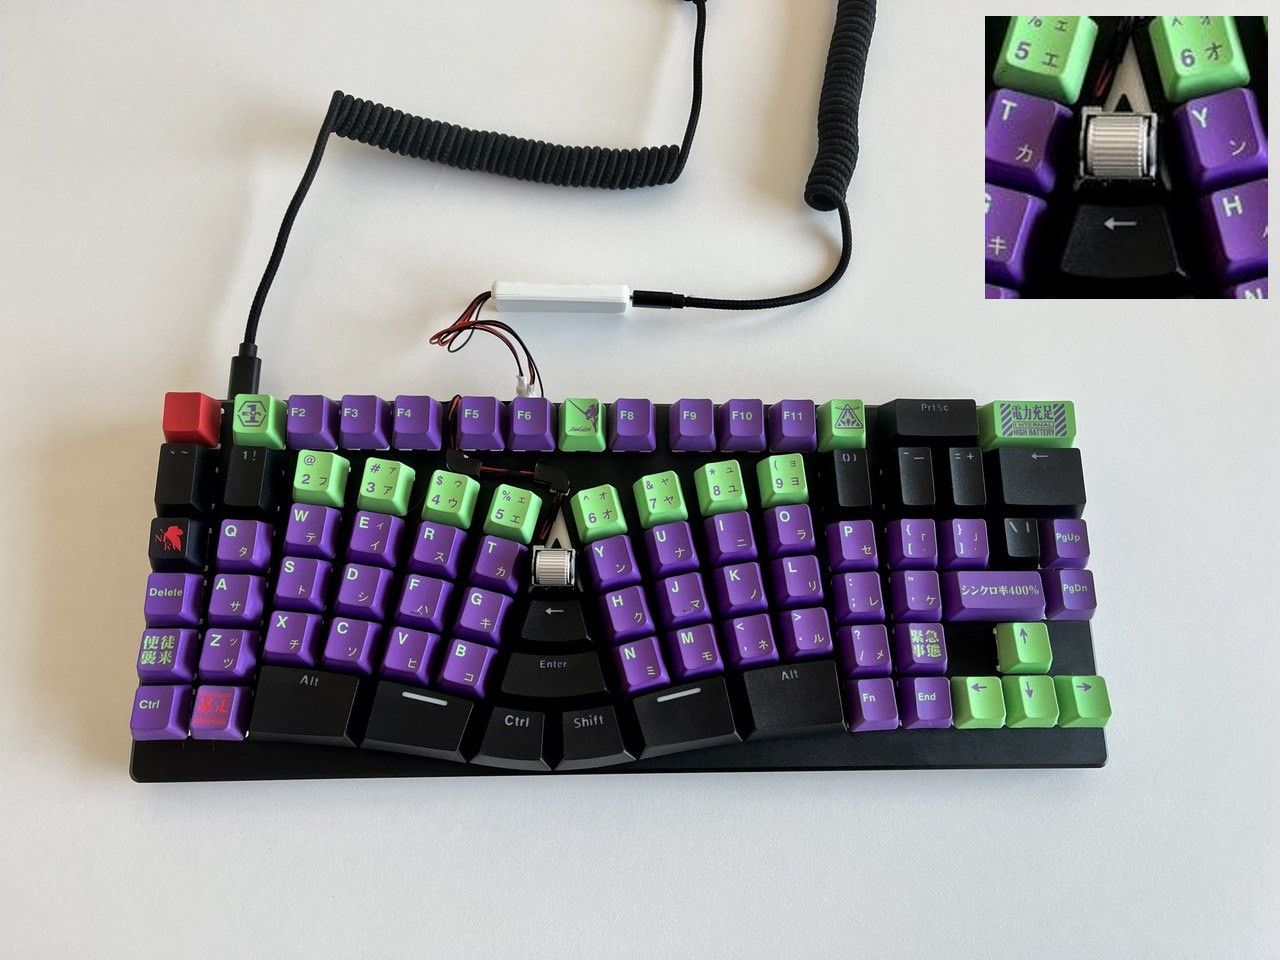
To improve this, let me tell you about a fast and simple mod to add a scroll wheel to a mechanical (or even regular) keyboard. No need to build the keyboard from scratch, it is an add-on:
In this example, I will be talking about
X-Bows Lite
which conveniently has some free space in the middle. But you can apply it to any keyboard, by positioning the scroll in any place. For example replacing
[Caps Lock]
or putting scroll near
[↑]
arrow.
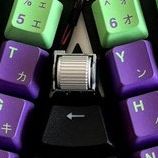
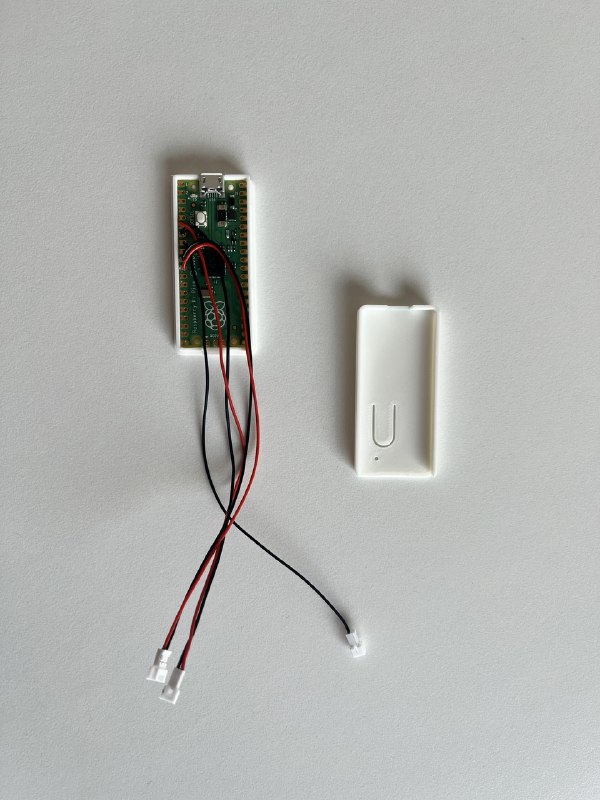
For a scroll wheel itself, let's pick a EVQWGD001 Rotary Encoder which is roughly the size as a keyboard button. To read scroll movements and send it to the computer as if it was a mouse we will take the most available option - Raspberry Pi Pico.

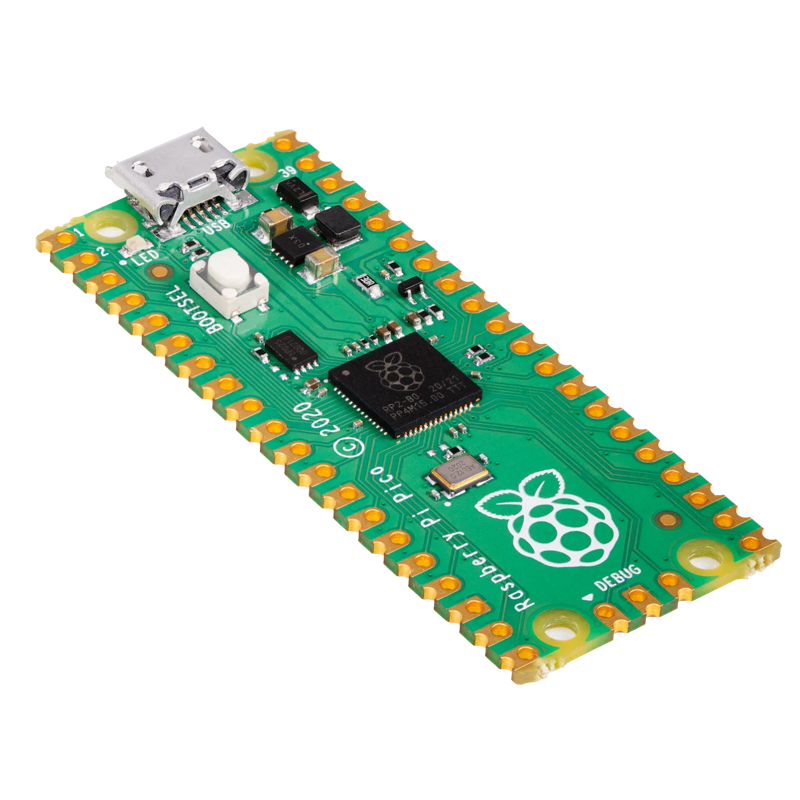
For a software bit, we could always use a Circuit Python or a QMK - firmware commonly used in fancy custom mechanical keyboards. Of course, using QMK for a couple of events is a hu-u-uge overkill, but setting it up is relatively simple and well-documented . Also want to keep things open for further extension - maybe add more features later.
So the build itself is pretty simple.
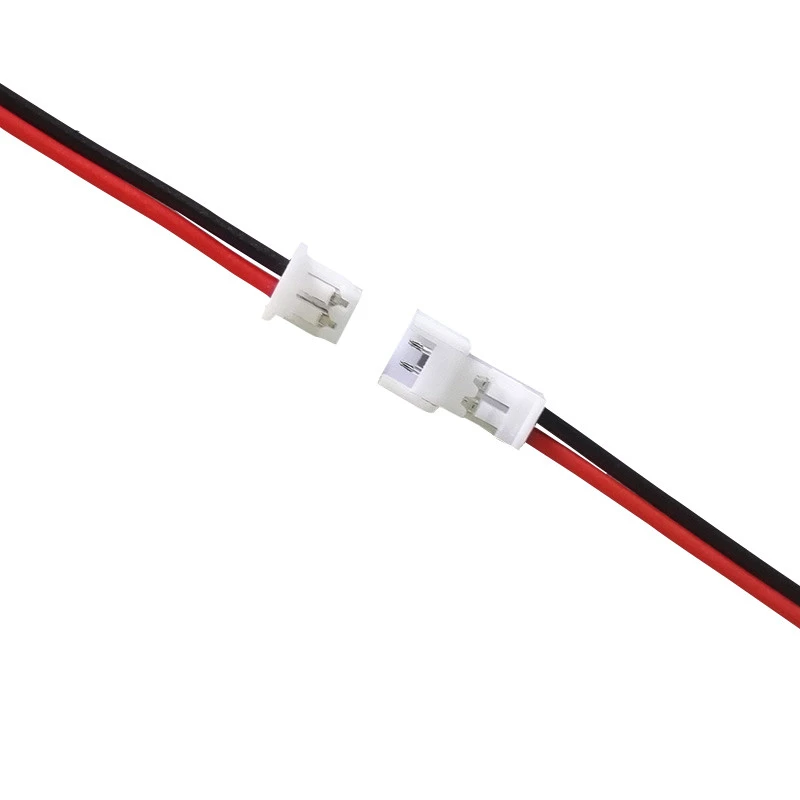
To keep things flexible, I recommend using 2pin (or more) connectors in between Pico and Encoder, so it is simpler to modify or fit in a case later:
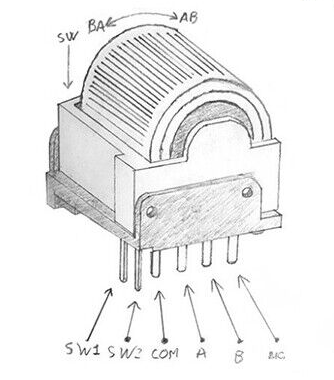
First Follow the installation as described at Adafruit . It provides us with a guide to create a one-key keyboard, so connect:
- Encoder → Pico
-
SW1→GP4 -
SW2→GP5
As a result, clicking on the encoder should act as a keyboard
A
key.
Later, I would recommend to change click to some unused key (like
KC_MY_COMPUTER
) and bind it to
centering mouse on active window
via system shorcuts. Because scrolling in a typical application usually scrolls the area under the mouse cursor, and if the cursor is in a random position, scrolling can occur in unexpected places.
The next thing is to finally enable the scroll wheel. This functionality is already implemented in QMK , we just need to enable it. To make so, apply changes from this commit , and connect:
- Encoder → Pico
-
A→GP7 -
B→GP8 -
COM→GND
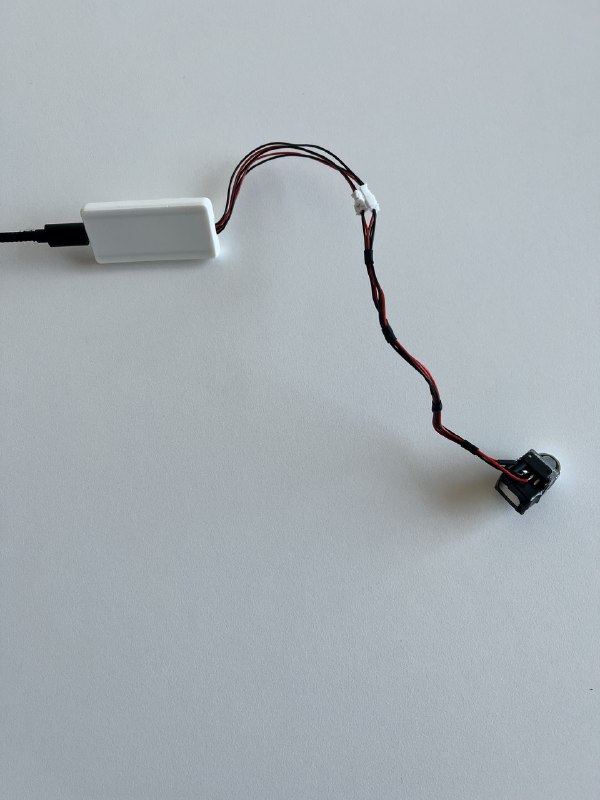
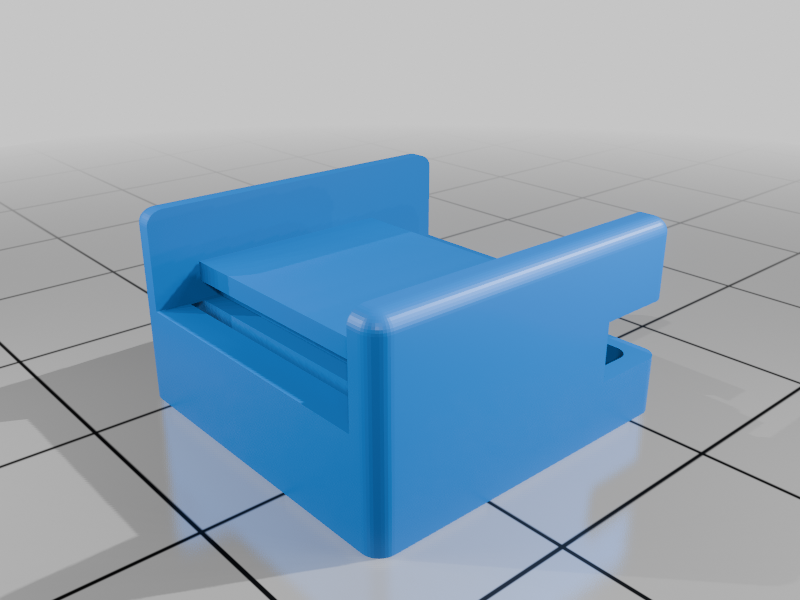
When everything works, encoder and cable can be fixed using using two-sided tape. A better solution of course would be to put the cable under the keyboard plate, but I
I too lazy
like the Cyberpunkish look of exposed wires. Also it would be good,
but not necessary
to 3dprint:

So that's it, hope you will appreciate how convenient the scroll wheel on the keyboard is, and will wonder how you lived without it before!
Don't forget to check evolution of this project :
#DIY #MechanicalKeyboards #QMK
-
Unless we are speaking about Windows of course. Windows nullifies hardware processing power achievements by being so painfully slow, that users can daydream while waiting for the interface to react. ↩