I decided to enter the NOVA demoparty again this year, trying another 64K Linux demo as I quite enjoyed working on my entry for the previous year. Only this time I'd work a bit more on the tooling. Here is the result - Progscape. It came in fourth out of nine entries. Not too bad; I'll take that given the competition.
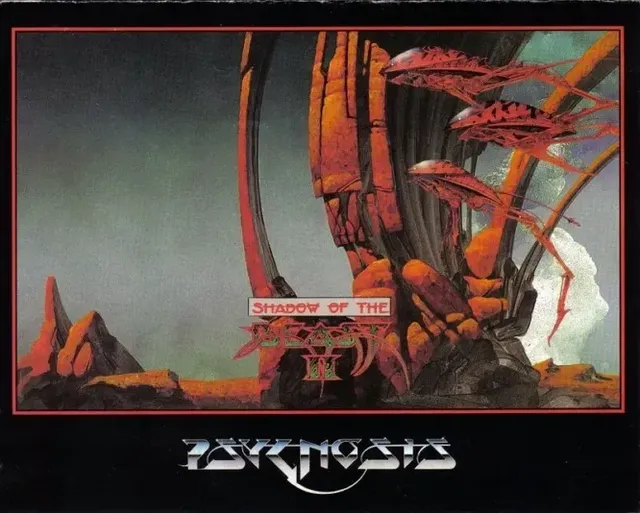
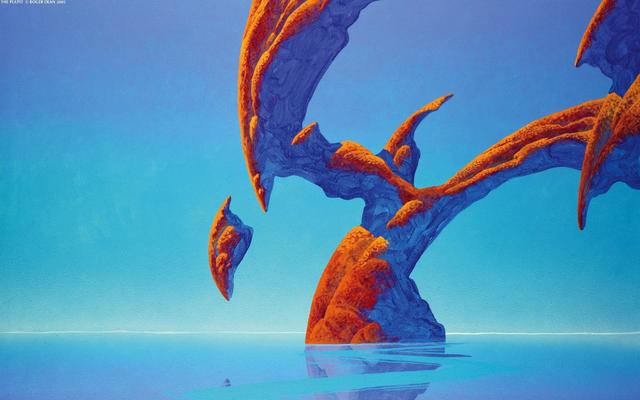
The inspiration for this demo came from the artwork of Roger Dean. I mean, his work just screams prog-rock! As he seems to mostly do landscapes, the phrase ProgScape came to mind. I might be the one to have coined that phrase? I've been a fan of his work for a while. Many might recognise his work from the classic Amiga computer game Shadow of the Beast.
The last time I entered NOVA I had a last minute problem, where the toolchain I was using failed to work correctly with the latest Linux sound system (Pipewire I believe). In the end I had to release the demo uncompressed, which was a shame. To avoid this problem in the future, I decided I'd make my own toolchain, based on the work of PoroCyon, with help from this webpage.
There are a number of tools and techniques one can use to make small Linux demos; this list is not exhaustive. I settled on the following workflow:
This will give you a pretty tiny filesize. You can go even smaller by replacing a lot of standard library functions (such as memcpy) with some inline assembly. I never went that far because I was a little wary of getting it wrong and I wasn't hurting for space at this point. Nevertheless, I will come back to this in the future.
The musician on the project - Altiga - uses Sointu, which is a tiny synthesizer written in Go. We both had a go with the new 64klang, but I couldn't make it work. Whatever you may think about vibe-coding, this particular vibe-coded project wasn't quite ready for use in this demo I thought. I could get it to compile, but I had no idea how to use. I'd like to get it working in the future. Sointu works fine though, and it make for pretty tiny music.
Any textures I use, I save as JPEGs. This seems to give the best compression (there may be better? I've only gone through the major formats). I have a little program that converts any files to their C byte array representation, but I believe you can do this using the program xxd with the correct flags. This makes embedding all your assets quite easy.
I started using Meson to pull it all together, but as lovely as Meson is, it doesn't like messing around with intermediate compilation products, like object files. The entire build pipeline relies on being able to muck around with object files, so I had to revert to Makefiles. To be honest, I don't mind Makefiles, but they can get out of hand pretty quickly; the current one is much too messy. I might go back to Cmake in the future and see how it goes.
The keen eyed among you might have spotted what isn't in this toolchain - a shader minifier. Typically, one would write their shader in a normal way, then pass it through a program that strips it down to the bare essentials to save space. The existing shader minifier everyone uses is written in the FSharp language - Microsoft only. It can work on Linux, but it's a lot of effort. Python would have been a much better choice for this sort of thing, but I understand the developer might have just fancied something different? Eitherway, I thought I'd try and vibecode a version in python, using Claude. It didn't go well. The direct translation from FSharp to python didn't work. I had a bit more luck with starting from scratch, but still the output was not working fully. In the end, I gave up and used no minifier. Not ideal, but time was pressing.
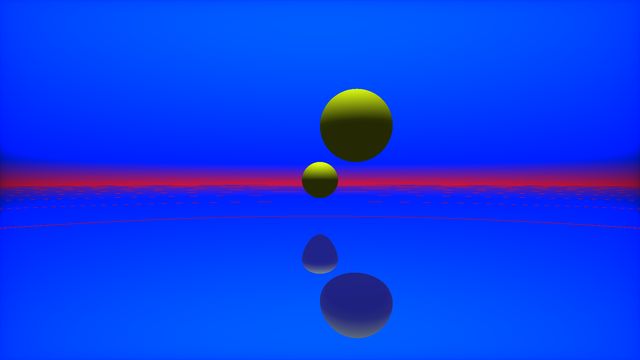
All of the visuals are generated using Ray Marching with Signed Distance Fields. I've used this technique a few times. In a nutshell, you use the pixel shader to shoot rays out into a scene that is defined using distance fields; at any point in space you can calculate how far away you are from something. With this distance, you advance along the ray that distance until the distance to the nearest object is effectively zero. You've hit something! Return the colour of the thing you hit. That's your pixel colour. Repeat for all pixels on the screen.
The real magic comes in with how you create all the distance fields. The de-facto resource for all these functions is Inigo Quilezles. Shadertoy is very handy too, as is the website for the demo-group Mercury. You can bend, twist, repeat or even merge distance fields, creating all sorts of lovely shapes.
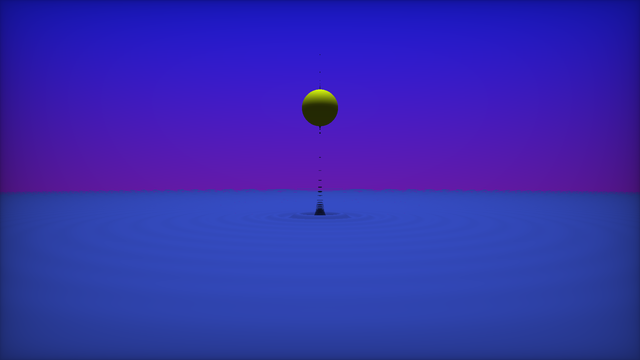
The water that appears in many of the scenes is fairly basic. If a ray hits the water surface (generated using noise and sine curves), the ray should be reflected and refracted. As I don't have anything below the waterline, I don't need the refraction step, which saves on performance. We find the normal to the water and reflect the ray accordingly and carry on before, seeing what we hit. When we do hit something we mix in a little bit of the water colour. Simple.
The cloud effect used in two of the scenes is the same one I used in my previous demo, with some slight improvements. There's an excellent writeup here.
Roger Dean uses some interesting colours in his work. Shadows, mid-tones and highlights tend not to be of the same hue. So you can't just have a red rock - say - with bright red highlights and dark red for the shadows. In one painting, the highlights were yellow, the midtones red, and the shadows blue. To make this work in a shader, I'd pick 5 colours that seemed to be the major components and create a gradient that passes through all five. This requires some careful consideration it turns out. I was advised (when I asked around) to convert my RGB colours into a linear colour space. Typically, these RGB colours are actually sRGB - a non-linear colour space. The equation looks like this:
However, you can get away with a simplification:
Once your colours are in linear space, you can place them into an array to make gradient creation easy. Typically, you'd start a gradient at 0, and finish at 1. In our case, the 5 numbers are placed equidistant from 0 to 1, with the darker colours at the 0 end. Given a number - x - between 0 and 1, we can find the two colours we are between and use the glsl mix function to obtain our colour. We then need to go back to sRGB by using the inverse of the function above.
There are a number of colourspaces one can use when mixing, blending and interpolating colours - it seems to be quite a big area. OkLab is one such colourspace that has been recommended to me. There's an excellent example of this on Shadertoy.
One of the major things I wanted to add to the toolchain was double pass rendering; the first drawing pass draws to a texture, and not to the screen. The second pass draws a single quad the size of the screen, using the result of the previous pass as a texture. This means we need two shaders - increasing the demo size. But I think it's worth it for a 64K demo. You can do lots of nice post-processing effects, such as anti-aliasing, blur, bloom and all sorts. I needed to use all these effects by the end of the project. I'll talk more about these effects very soon.
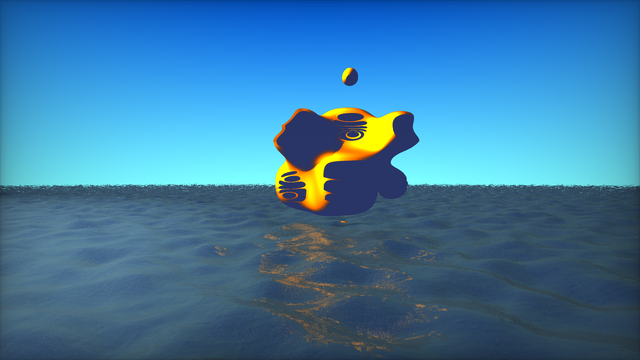
I started by bringing in a basic ray-marcher with a sphere and a plane. Once I know this basic stuff is working, I can move forward.
Modelling the water was a little tricky at first. The basic method is to use some sort of travelling sine wave, with perhaps a little noise here and there. At first, it was a bit of a mess with gaps appearing here and there.
Eventually I managed to reign it in a bit and it began to look okay. I don't need to do any refraction or extra effects like splashes or spray fortunately.
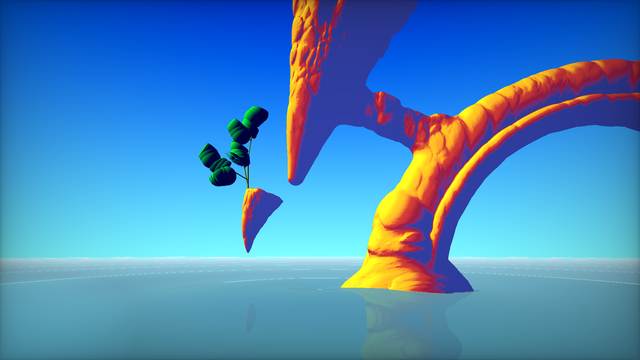
The first scene I wanted to recreate is called "The Pulpit". Roger Dean has a thing for floating islands. I quite like the ominous, pointy rock floating above. I figured this would be a good place to start.
The first step was to put together the basic shapes, using primitives like cones and torii, using bends and merging functions to create more interesting textures and tones.
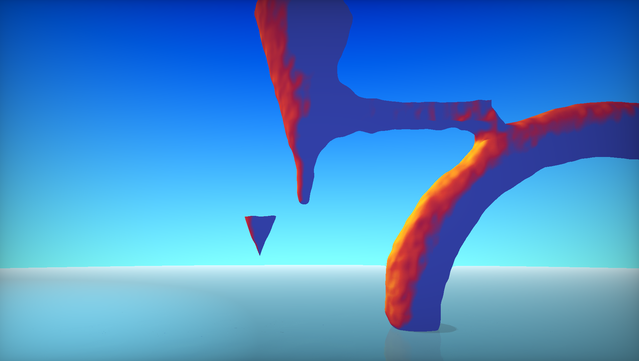
Sadly, no matter what I did, the noise functions were not giving the right sort of 'rocky, bumpiness'. I've tried a couple of different noise functions, but didn't quite have the patience to explore any odd ones. In the end, I found a black-and-white pebble texture and decided to use that throughout, with the occasional additional noise. The result seemed much better.
Roger Dean tends to place trees of a particular kind in his images. I started to have a look at how that might be done. L-Systems seem to be the main way. Trunks and branches aren't so hard, but there is a performance hit. Leaves, on the other hand, are quite tricky! In the end, I decided to use the cloud algorithm for the leaves as well. Saves space and gets the impression across at least, but it's not ideal.
Towards the end of the project, I was getting some big hits on performance. Some of the scenes were really struggling. I wanted to see what the actual framerate was. There's an excellent tool for Linux called Mangohud. It's very simple to use; just run the command mangohud followed by your executable name...
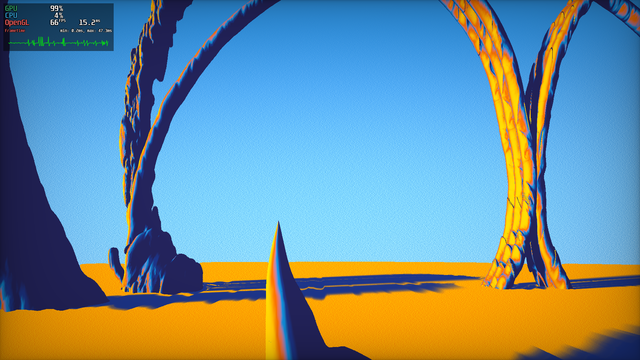
... and you get a nice little FPS counter with a graph. It's rather handy for checking on performance. Some things hit performance more than others - blend functions and certain noise functions were the worst.
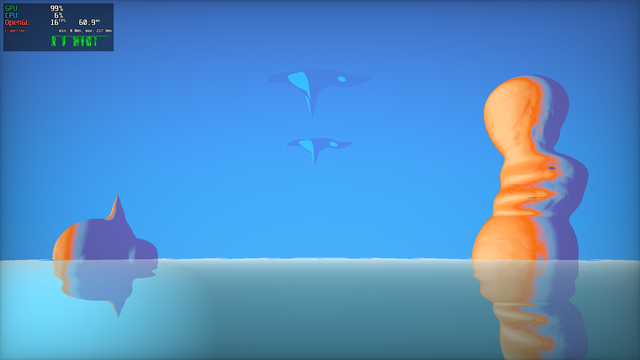
I started thinking about the scenes I wanted to have. Colour variation was one of the drivers - warm scenes, cool scenes, that sort of thing. I decided to finish with a classic castles in the sky sort of affair. Initially, I was only going to have 5 scenes, but I'm glad I added the last one. It's not really based on any Roger Dean work. I think that's why I like it - it's somewhat original.
I found that performance was not great. Now I could have spent a fair bit of time trying to analyse all the code, optimise things to within an inch of their lives, but time was pressing so I decided to cheat - render a smaller image and scale it up. I mentioned that I needed two passes; the original framework I was using only had one pass (though it's simple enough to add another). With two passes you can render your scene at a small resolution in the first pass, then scale it up in the second.
It's very much the cheap and nasty way to increase the framerate on a ray-marching setup.To make that work, To smooth over the jagged edges, I used a gaussian blur, FXAA, some Bloom and a little mixing. I think I actually prefer this approach to my original one. It has a more dream-like quality to it. I think that adds a little to the overall feel.
There are some small things that make a difference - many of which are listed on this excellent page. Things such as removing banding, colour grading and such like.
Demos really benefit from music. It's always odd to see a demo and hear no soundtrack. Thankfully, Altiga came to my aid again with a great soundtrack, made with Sointu. They've written up how they did it, much better than I could, so if music is your bag, do give it a read.
The perception I have of Linux in the demoscene is that it just doesn't have that special something; Linux is already punk so hacking it to make art probably doesn't have the cachet that hacking Windows does. There's a longer history of Windows demos; the tools are very mature. The nVidia drivers are better on Windows (or at least less faff)1. But above all else, I think it's to do with the fact that Windows presents a uniform target. Linux's strength is - unfortunately - a weakness in the demoscene world.
Nevertheless, this does leave some untrodden ground for the enterprising demoscener. Trouble is, you need to make sure your demo will run at the party. NOVA is a small affair compared to Revision - they do a grand job but can't bring all the hardware to run things live - and I can't lug my desktop unit all the way from Scotland. So I resorted to a Live USB stick.
Revision has a Linux Mint 22.3 LTS machine with the latest nVidia drivers, so I thought I'd go with that as a target. Linux Mint has libjpeg, librsvg and SDL2 libraries installed and uses pipewire for sound. It has a Live USB image you can download and boot from. The tricky part is modifying this USB image.
Some Linux distributions have a persistence option. If a particular file exists on USB stick, it will be mounted by the operating system and used as some sort of overlay? I'm not exactly sure of how it works - I'll need to look into it more. But Linux Mint supports having an overlay, which is good news for us.
But how to take advantage of this? After much trial and error with Rufus and a dozen other Bootable USB makers, I settled on the excellent Ventoy. Ventoy has support for persistent USB images - it even has the tools needed to create the persistence files. It's all nicely detailed on their wiki. Fantastic! The overlay file needs to be quite large - 4G at least - to give one enough room to install all the nVidia drivers.
The only remaining problem is that USB live sticks - at least mine - tend to be a bit slow. Or rather, they'll run fine, then stop for a bit, then run fine again. I've no idea why this is the case. I feel like making USB bootsticks is an art in itself! Something else I'll need to investigate in the future I think.
When running the demo, it's better to run it out of RAM instead of from the USB stick. In the past, I've had stutters and desynchronisation with the music. RAM disks are quite easy to make:
mkdir /home/mint/Desktop/RAM_DISK
sudo mount -t tmpfs -o size=2G tmpfs /home/mint/Desktop/RAM_DISK
Moving the demo file over to the RAM_DISK, then running it from there gives the best performance.
There are a number of things I want to work on for the next demo:
Much of these can be grouped together under the heading: having tools that suit me. I'm a big fan of the work of Steffest.They make many of their own tools. This is a deep link to craftsfolk of ages past - "The best tool is the one you make yourself".
Spending time on tooling was definitely the right decision. My understanding is that many of the larger, more established demo groups have a some very involved development environments, rivalling these of some game studios (probably because many sceners are also game devs).
Not to be too negative, but I don't think I fully captured the Roger Dean Vibes except perhaps on one of the scenes. When you look closely at his artwork, you can see all the brush strokes, the subtle differences in colour and the texture in the rocks. Not only that, theres often a figure, or mythical beast somewhere in the painting that really gives a sense of scale. Not only that, these figures could be us? It helps to bring you into these worlds I think. I regret not putting at least one figure in.
I'm happy with the love-letter, but it's a bit too much of a copy of someone else's artwork I feel. But I suspect this is how a lot of folks get started. This year has been more of a focus on tools and reliability - understanding the techniques and refining the process.