A solution for beginners and much more
| Simply
Rubik A solution for beginners and much more |
|
|
|
|
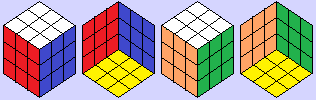
3x3x3 Solution 1, Top LayerREMEMBER: Before starting any algorithm, make sure that the front (dark grey) face is facing you and the top layer is on the top.
Important: To successfully solve the top layer each step must be completed in the order it appears on this page. Step 1. Orienting The Edges / Making The Cross.As with the bottom layer the first thing you need to do on the top layer is make the cross, however, this time you don't need to line up the edge colours with the side centres, you will be doing that after you have finished the top layer's corners, so if you already have the cross on the top go to, "Step 2: Orienting The Corners".
Step 2. Orienting The Corners.If all four corners are showing white faces on the up face then go to, "Step 3: Positioning The Corners". If only one of the corners is showing a white face then perform the appropriate algorithm to rotate the other three.
The following configurations require the performance of two algorithm, firstly perform algorithm 1 then check the top configuration of the cube to ensure that the front face is facing you to perform algorithm 1 or algorithm 2.
An easy way to remember how to hold your cube when it has one of the above configurations is, if there are two white corner faces showing on the up face, you must have a white corner face on the top right of the front face and if there are no white corner faces showing on the up face then you have no white corner face on the front face. Step 3. Positioning The Corners / Exchanging The Positions Of Adjacent Corners.Check the top layer, if all four corners are positioned in the right place go to, "Step 4: Positioning The Edges", if not turn the cube and look for matching coloured pair of corners on a side face of the cube. Turn the top layer so that your matching pair are in the right place, this is now the front face. The corners that will be swapped are the back corners coloured gold in the graphics below. The worst case scenario is that there is no matching pair on a side of the cube, simply perform the algorithm and check again and you should find a matching pair. Note: You only need to perform the last step (coloured red) when you are positioning the final two corners.
Step 4. Positioning The Edges.At this point your cube will either be solved or you will need to reposition three or all four of the edges. If you need to reposition all four edges you will need to perform two algorithm, the first algorithm you use will only place one of the edges in the right place leaving three to be repositioned. To reposition three edges choose the algorithm that moves the three out of position edges either clockwise or anti-clockwise to reposition them correctly, finishing the top layer. An easy way to identify rotations three and ten in the algorithms (the only rotations that differ in Algorithms 1 and 2) is that the edge with the same coloured face as the front face is rotated to the front. Alternatively you can learn one of the algorithms and if the rotation of the three out of position centres are wrong the first time round they will be right the second time you perform it.
NOTE: If you are solving a cube with pictures, letters or numbers on the faces, such as a Sudoku cube, this solution will more often than not leave you with centres that are not correctly oriented so the following statement is not strictly correct. For a solution for picture cubes and algorithms for rotating centres see 3x3x3 Extras. That's it, you have solved Rubik's Cube, happy cubing. |
||||||||||||||||||||||||||||||||||||||||||||||||||||||||||||||||||||||||||||||||||||||||||||||||||||||||||||||||||||||||||||||||||||||||||||||||||||||||||||||||||||||||||||||||||||||||||||||||||||||||||||||||||||||||||||||||||||||||||||||||||||||||||||||||||||||||||||||||||||||||||||||||||||||||||||||||||||||||||||||
|
|
|
|
| © Bob 2003 |


